Connecting Embeddable to Cube Cloud
Embeddable works seamlessly with Cube Cloud (opens in a new tab), letting you pick and visualize your Cube models right in Embeddable’s no-code builder.
The recommended way to connect Embeddable to Cube is via the REST API. To connect, you’ll need to provide your API Secret and Endpoint to Embeddable.
Find Your Cube Credentials
-
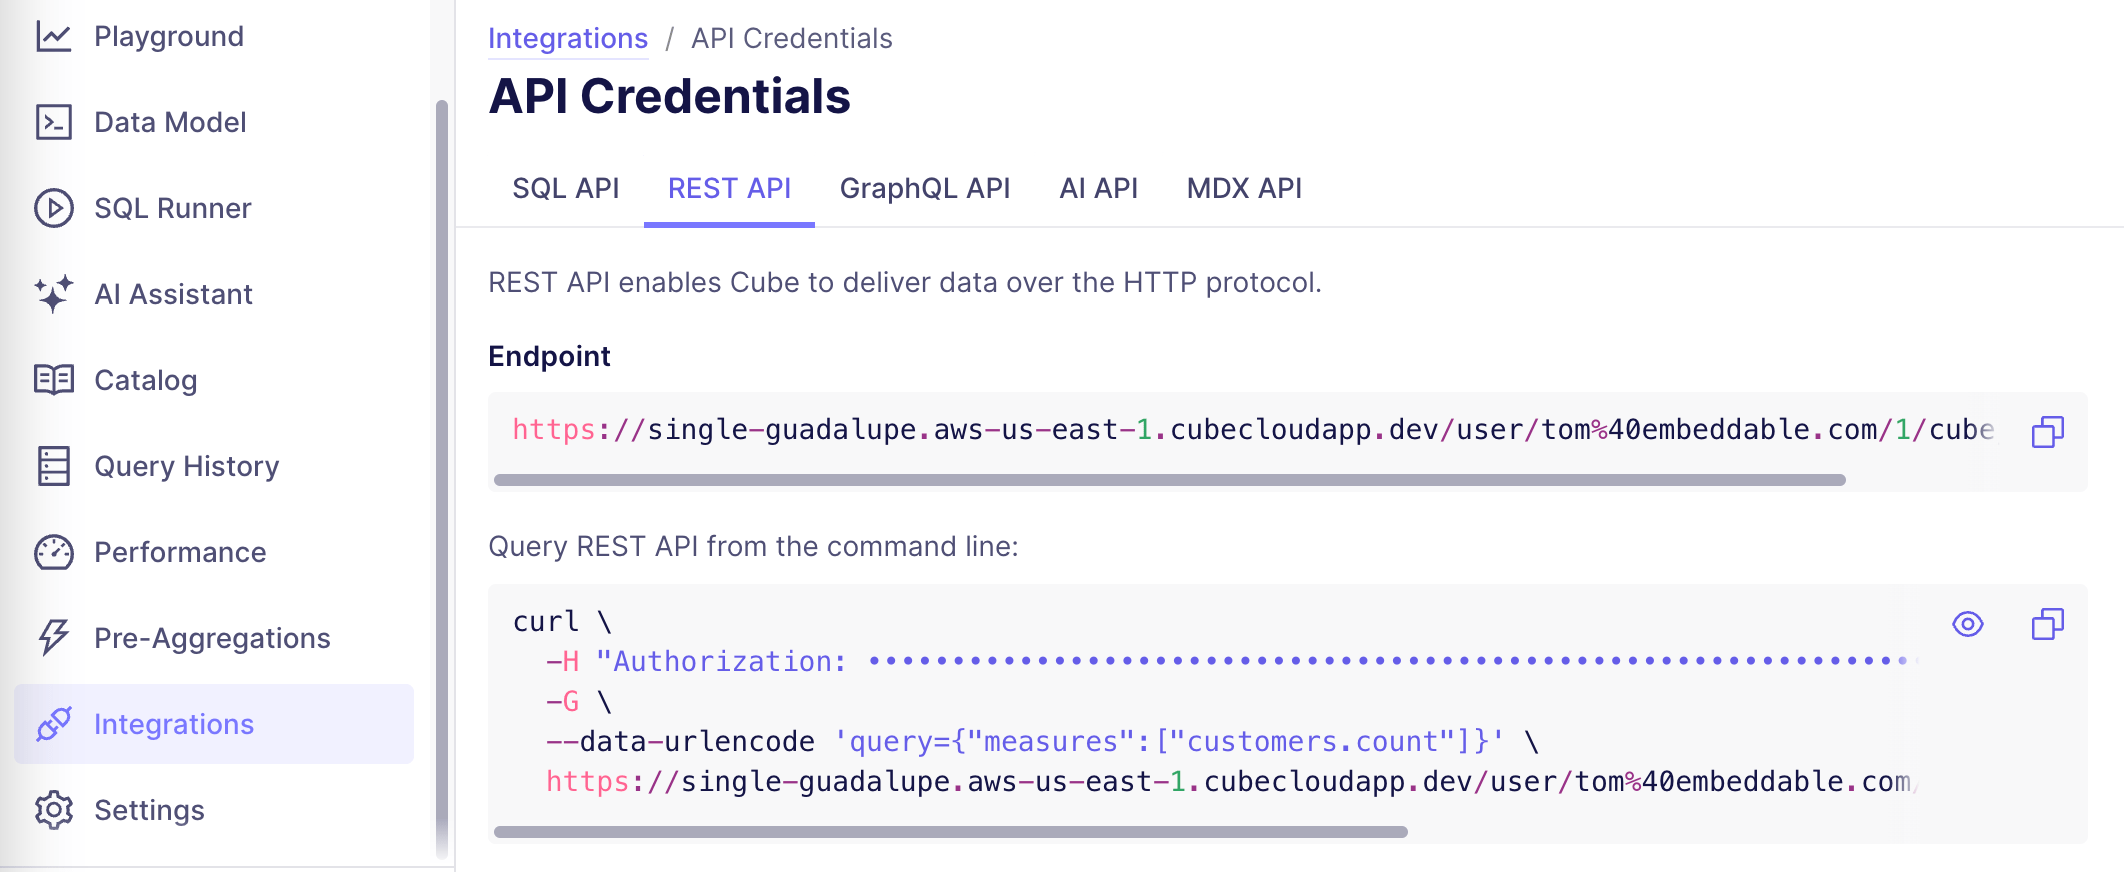
REST API Endpoint
- You can find your endpoint in the Integrations tab in the Cube Cloud platform, accessible from the left side menu. Once you’re there, select the tab ‘REST API’ and copy your credentials.
-
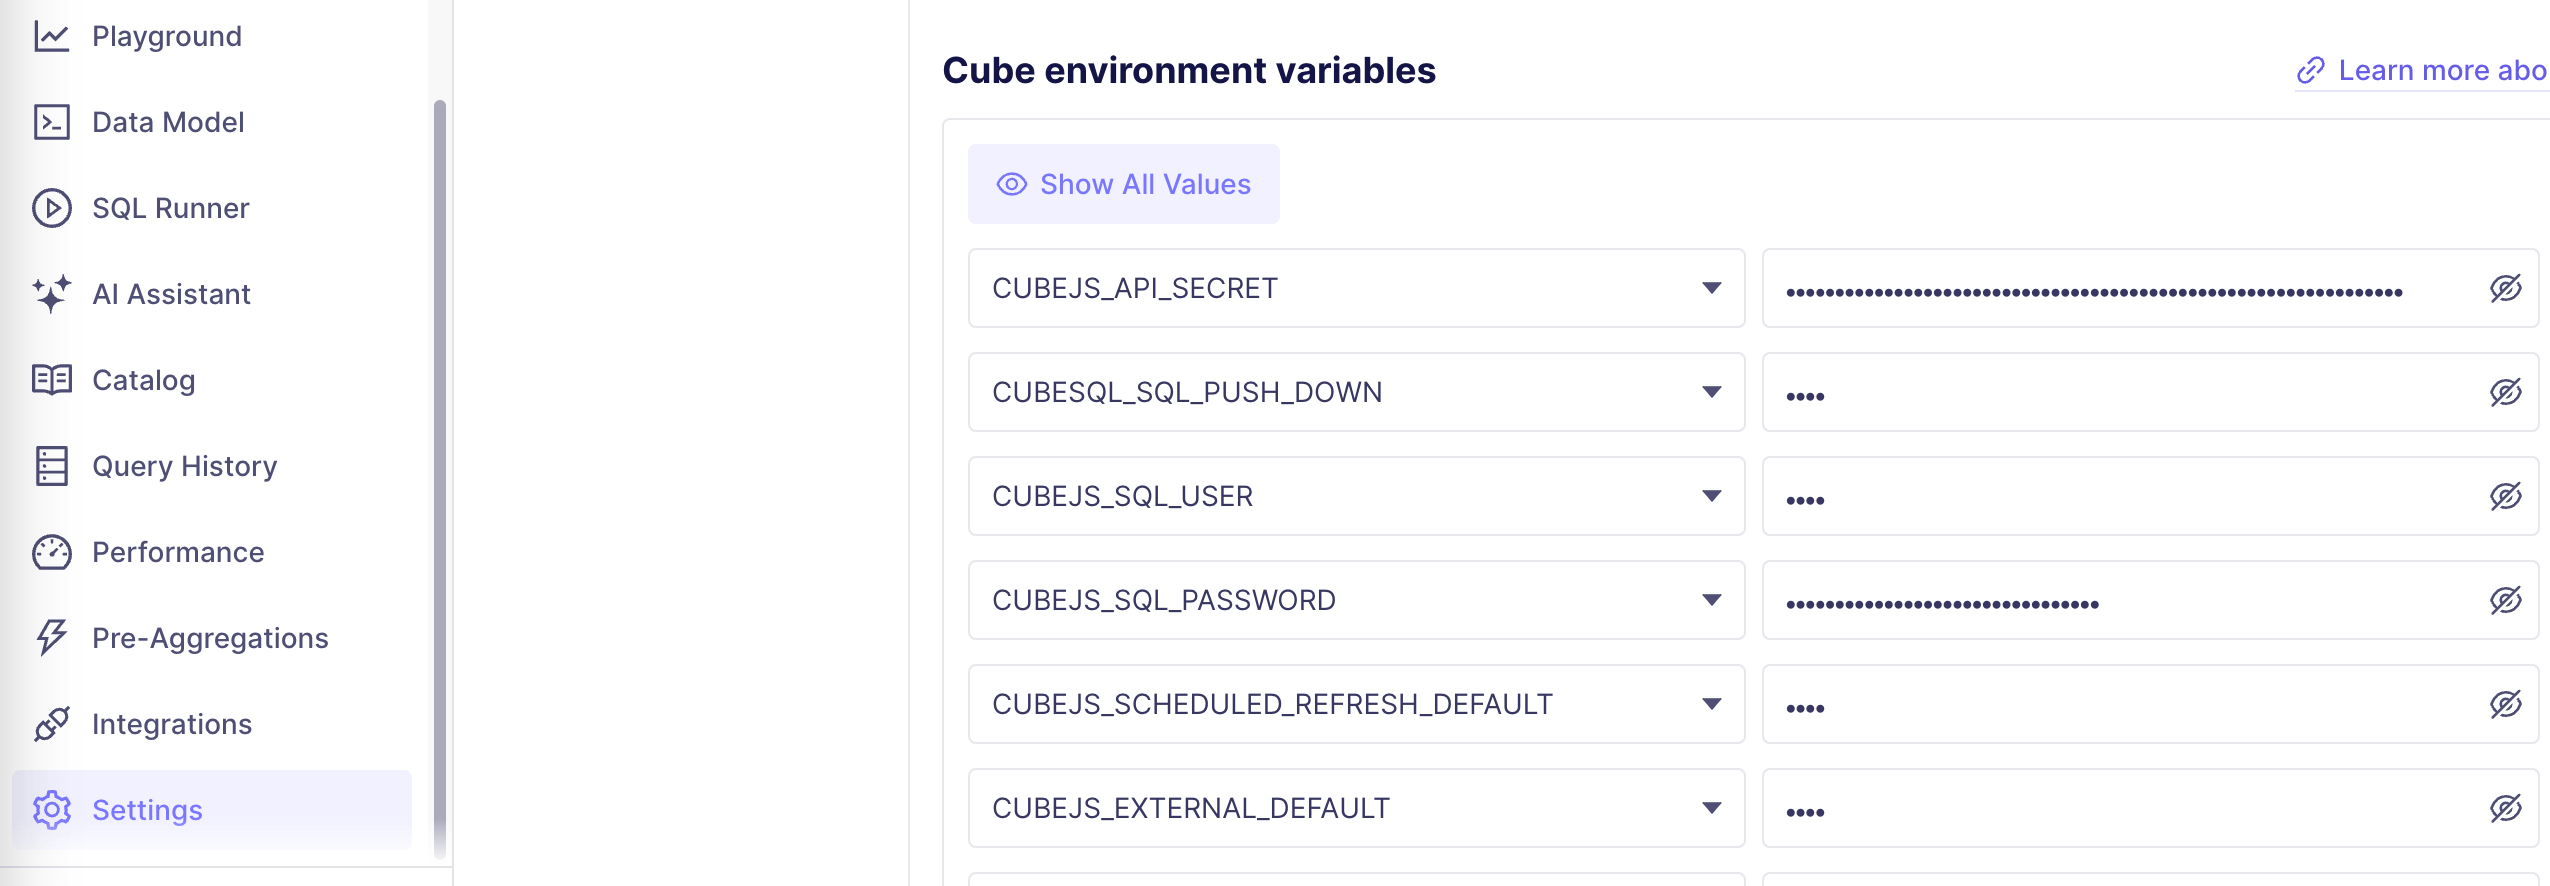
API Secret
- Under Settings → Configuration in Cube Cloud, look for Cube Environment Variables.
- Copy your API Secret.
Share Credentials with Embeddable
Depending on your setup, either:
- Enter these endpoint and secret values directly into Embeddable’s Integrations section.
- Or provide them securely to the Embeddable implementation team.
Use Your Cube Models in Embeddable
Watch this short video demonstrating Cube Cloud and Embeddable in action:
Cube Cloud Dual Authentication (JWKS)
This section explains how to configure dual authentication for Cube Cloud, allowing your Cube Cloud instance to support both JWK-based authentication (for customer applications) and secret-based authentication (for the Embeddable backend).
Cube Cloud Configuration
- In your Cube Cloud environment, set the following environment variables:
CUBEJS_JWK_URL: Set this to the JWKS endpoint URL from your identity provider. For example, Auth0 provides the following URL:https://{yourDomain}/.well-known/jwks.json
Cube.js Configuration Files
- Copy the
auth.jsfile to the root of the cube cloud folder (see below for example). - Copy the
cube.jsfile to the root of the cube cloud folder (see below for example). - Copy the
package.jsonfile to the root of the cube cloud folder. This file lists the required dependencies (jsonwebtokenandjwks-rsa- see below for example).
Deploy to Cube Cloud
- Upload the
auth.js,cube.js, andpackage.jsonfiles to your Cube Cloud environment. - Deploy your Cube.js application. If you’re doing this for the first time, information can be found in Cube’s Documentation (opens in a new tab). Additionally, we recommend following Cube’s Guidelines for continuous deployment (opens in a new tab).
How it Works
- JWK Authentication: When a request comes from your applications, Cube Cloud will use the
CUBEJS_JWK_URLand thevalidateJwtfunction inauth.jsto authenticate the request using the provided JWT and the JWKS from your identity provider. - Secret-Based Authentication: When a request comes from the Embeddable backend, it will include the
Request-Origin: embeddableheader. Cube Cloud will then use theCUBEJS_API_SECRETand thevalidateEmbeddableJwtfunction inauth.jsto authenticate the request using the shared secret key.
Important Notes
- Backend Requests: The Embeddable backend will automatically include the
Request-Originheader in its requests to Cube Cloud.
This dual authentication setup provides flexibility and security for your Cube.js integration, allowing you to use both JWK-based and secret-based authentication methods as needed.
Auth.js
This is an example auth.js file. Copying and pasting this file probably won’t work for you (unless you have identical environment variable names), but it’s a good way to get started!
const jwt = require("jsonwebtoken");
const jwksRsa = require('jwks-rsa'); // jwks-rsa library handles caching of the JWKS internally

class AuthHandlerError extends Error {
  constructor(status, message) {
    super(message);
    this.status = status;
  }
}

const jwkUrl = process.env.CUBEJS_JWK_URL;
const jwksClient = jwksRsa({
  jwksUri: jwkUrl
});
const secretKey = process.env.CUBEJS_API_SECRET;

const customCheckAuth = async (req, auth) => {
  if (auth) {
    if (req.get('Request-Origin') === 'embeddable') {
      validateEmbeddableJwt(auth, req); // Secret key authentication
      console.debug("validateEmbeddableJwt JWT verification successful.")
    } else {
      await validateJwt(auth, req); // JWK authentication
      console.debug("validateJwt JWT verification successful.")
    }
  } else {
    throw new AuthHandlerError(403, "Authentication required");
  }
};

const validateEmbeddableJwt = (auth, req) => {
  try {
    const decoded = jwt.verify(auth, secretKey, {algorithms: ['HS256']});

    req.securityContext = decoded;
  } catch (err) {
    throw new AuthHandlerError(403, `validateEmbeddableJwt JWT validation failed: ${err.message}, ${auth}`);
  }
};

const validateJwt = async (auth, req) => {
  try {
    console.log("Starting JWT validation...");

    const getKey = (header, callback) => {
      console.debug("Fetching signing key with kid:", header.kid);
      jwksClient.getSigningKey(header.kid, (err, key) => {
        if (err) {
          console.error("Error getting signing key:", err);
          callback(err, null);
          return;
        }
        console.debug("Signing key:", key);
        const signingKey = key.getPublicKey();
        callback(null, signingKey);
      });
    };

    const decoded = await new Promise((resolve, reject) => {
      jwt.verify(auth, getKey, {algorithms: ["RS256"]}, (err, decoded) => {
        if (err) {
          reject(new AuthHandlerError(403, `jwt.verify, JWT validation failed: ${err.message}`));
        } else {
          resolve(decoded);
        }
      });
    });

    console.debug("JWT verification successful. Decoded payload:", decoded);
    req.securityContext = decoded;

  } catch (err) {
    throw new AuthHandlerError(403, `validateJwt JWT, validation failed: ${err.message}`);
  }
};

module.exports = {customCheckAuth, AuthHandlerError};
Cube.js
This is an example cube.js file. Copying and pasting this file probably will work for you, although you may want to modify it!
const { customCheckAuth } = require('./auth');

module.exports = {
  checkAuth: async (req, auth) => {
    await customCheckAuth(req, auth);
  }
}
Package.json
This is an example package.json file. This is almost certainly not everything you’ll need in your version. Better to just add these items to your dependencies object!
{
  "dependencies": {
    "jsonwebtoken": "^9.0.2",
    "jwks-rsa": "^3.1.0"
  }
}