Set up Environments
Environments let you map data models to different sets of database connections, depending on the user. This makes it easy to:
- Test embeddable against different environments (e.g. prod, QA, staging).
- Implement single-tenancy (database-level security) where each customer has their own database (or set of databases).
How It Works
Let's imagine you have a "prod" environment and a "staging" environment. Each environment defines mappings for the same two logical data sources.
Example: Prod and Staging Environments
Prod environment
The prod environment contains two data sources:
Database 1
data_source:primary_dbconnection:prod-postgres
Database 2
data_source:warehouseconnection:prod-bigquery
Staging environment
The staging environment defines the same logical data sources, but maps them to different connections:
Database 1
data_source:primary_dbconnection:staging-postgres
Database 2
data_source:warehouseconnection:staging-bigquery
Because the data_source names are the same across environments, no model changes are required when switching environments. The active environment determines which connections are used at query time.
To set this up, follow the steps below, starting with defining your database connections.
Define Connections
Use the Connections API to create named database connections (e.g. "prod-postgres", "staging-postgres"). Each connection includes the credentials (host, port, user, etc.) for a particular database.
Assign data_source in Your Models
In your .cube.yml (or .cube.js) files, specify data_source for each model. If omitted, it defaults to "default":
cubes:
  - name: orders
    sql_table: public.orders
    data_source: primary_db
This tells Embeddable that the “orders” model should look for a data_source named "primary_db" in the chosen environment.
Create Environments
For each environment that you want to define (prod, staging, etc.) you should define an Environment using the Environments API.
An environment is simply a mapping, mapping each data_source to a corresponding database connection.
Here is an example of how you could call the Environments API to create two environments (one for 'prod' and one for 'staging'):
//
// create a 'prod' environment
//
fetch('https://api.<region>.embeddable.com/api/v1/environments', {
  method: 'POST',
  headers: {
    'Content-Type': 'application/json',
    'Authorization': `Bearer ${apiKey}`
  },
  body: JSON.stringify({
    name: 'prod',
    datasources: [
      { data_source: 'primary_db', connection: 'prod-postgres' },
      { data_source: 'warehouse', connection: 'prod-bigquery' }
    ]
  })
});

//
// create a 'staging' environment
//
fetch('https://api.<region>.embeddable.com/api/v1/environments', {
  method: 'POST',
  headers: {
    'Content-Type': 'application/json',
    'Authorization': `Bearer ${apiKey}`
  },
  body: JSON.stringify({
    name: 'staging',
    datasources: [
      { data_source: 'primary_db', connection: 'staging-postgres' },
      { data_source: 'warehouse', connection: 'staging-bigquery' }
    ]
  })
});nameis a unique ID for the environment (e.g."prod"or"microsoft").datasourcesis a list mapping each model’sdata_sourceto a named connection (e.g. in the above example, all models whosedata_sourceis set to"primary_db"will use the connection named"prod-postgres").
Important: every environment you create should have the same set of data_source keys. They can (and likely will) point to different connections, but the set of data_sources should be the same (so that every data model has a valid connection in every Environment).
- Learn more about
regionhere.
Use the Environment via Token API
When requesting a security token, supply the environment field:
{
  embeddableId: "<dashboard-id>",
  environment: "prod",
  // ...
}- Embeddable automatically routes each model’s
data_sourceto the connections defined in your"prod"environment. - If
environmentis omitted, it uses the"default"environment (which is a special environment that always mapsdata_sourcenames onto aconnectionof the same name).
CRUD Operations
The POST request above represents a CREATE action, but all CRUD operations are available.
- POST
/api/v1/environments
Create a new environment. - GET
/api/v1/environments
List all environments. - PUT
/api/v1/environments/{name}
Update an existing environment. - GET
/api/v1/environments/{name}
Retrieve a specific environment’s details. - DELETE
/api/v1/environments/{name}
Delete the named environment.
Testing in the No-Code Builder
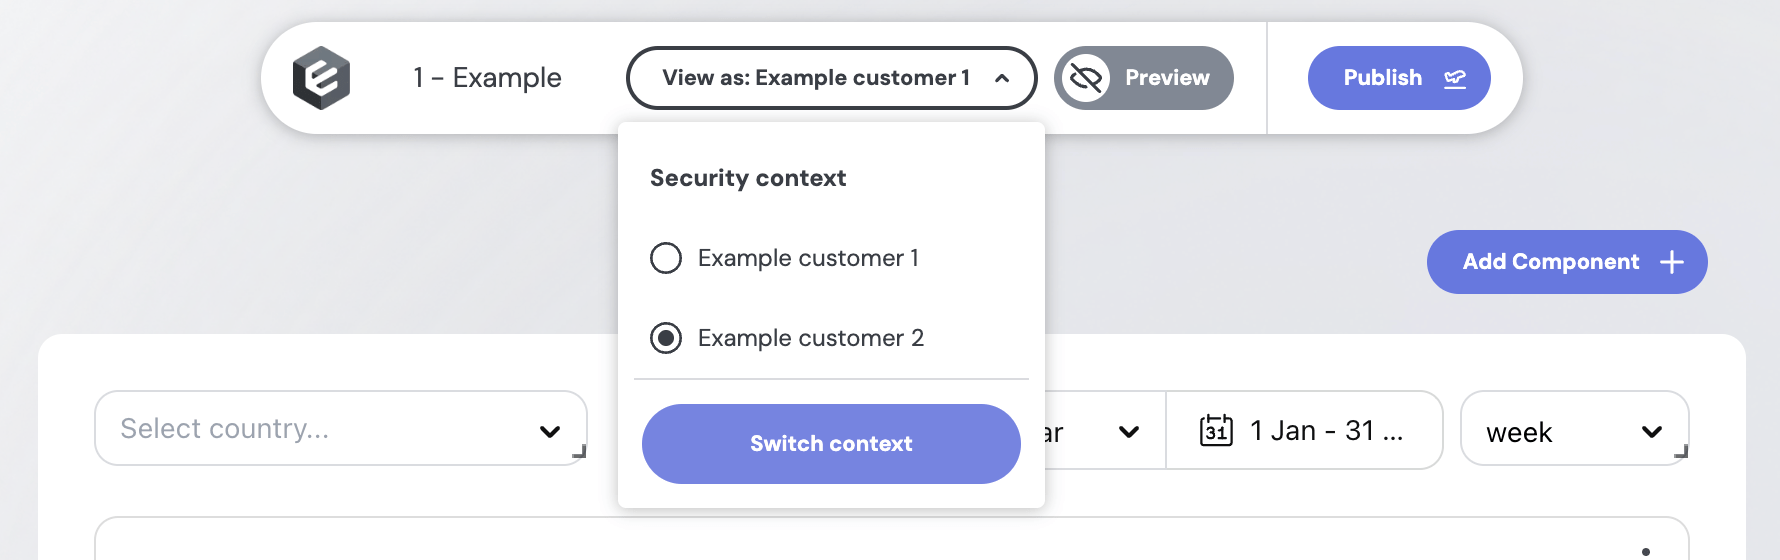
To preview environments before publishing, you can create or update your src/embeddable.com/presets/security-contexts.sc.yml (here (opens in a new tab)) with entries specifying the environment:
- name: Example customer 1
  environment: production
  securityContext:
    country: United States

- name: Example customer 2
  environment: staging
  securityContext:
    country: Germany
In the builder UI, you can then choose “View as” → “Example customer 2” to load the staging environment, verifying your data and filters. Switch back to “Example customer 1” to confirm production data.
Advanced use-case: If you have multiple data models each with unique data_source values, you can define an environment that includes only the data sources you want for a particular user—offering fine-grained control over which models (and thus which databases) are active for that environment.
Deploying Versions
Once you have set up your environments, you can deploy versions of your dashboard that are specific to each environment. This allows you to test changes in a safe environment before promoting them to production. Learn more about deploying dashboard versions.