Deploying Custom Canvas
Custom Canvas empowers your end-users to build their own dashboards inside your product. You can configure it as described here and it will work out of the box. However, there are several customisation options that you will likely want to consider. To customise its look & feel (colors, cards, buttons), see Custom Canvas UI.
You can find a Live Demo of Custom Canvas in a React App here (opens in a new tab), and you can find the source code for the demo here (opens in a new tab).
Terminology
In Embeddable there is a difference between how your team build dashboards and how your end-users build dashboards. To avoid confusion, we use the following terminology throughout this page:
-
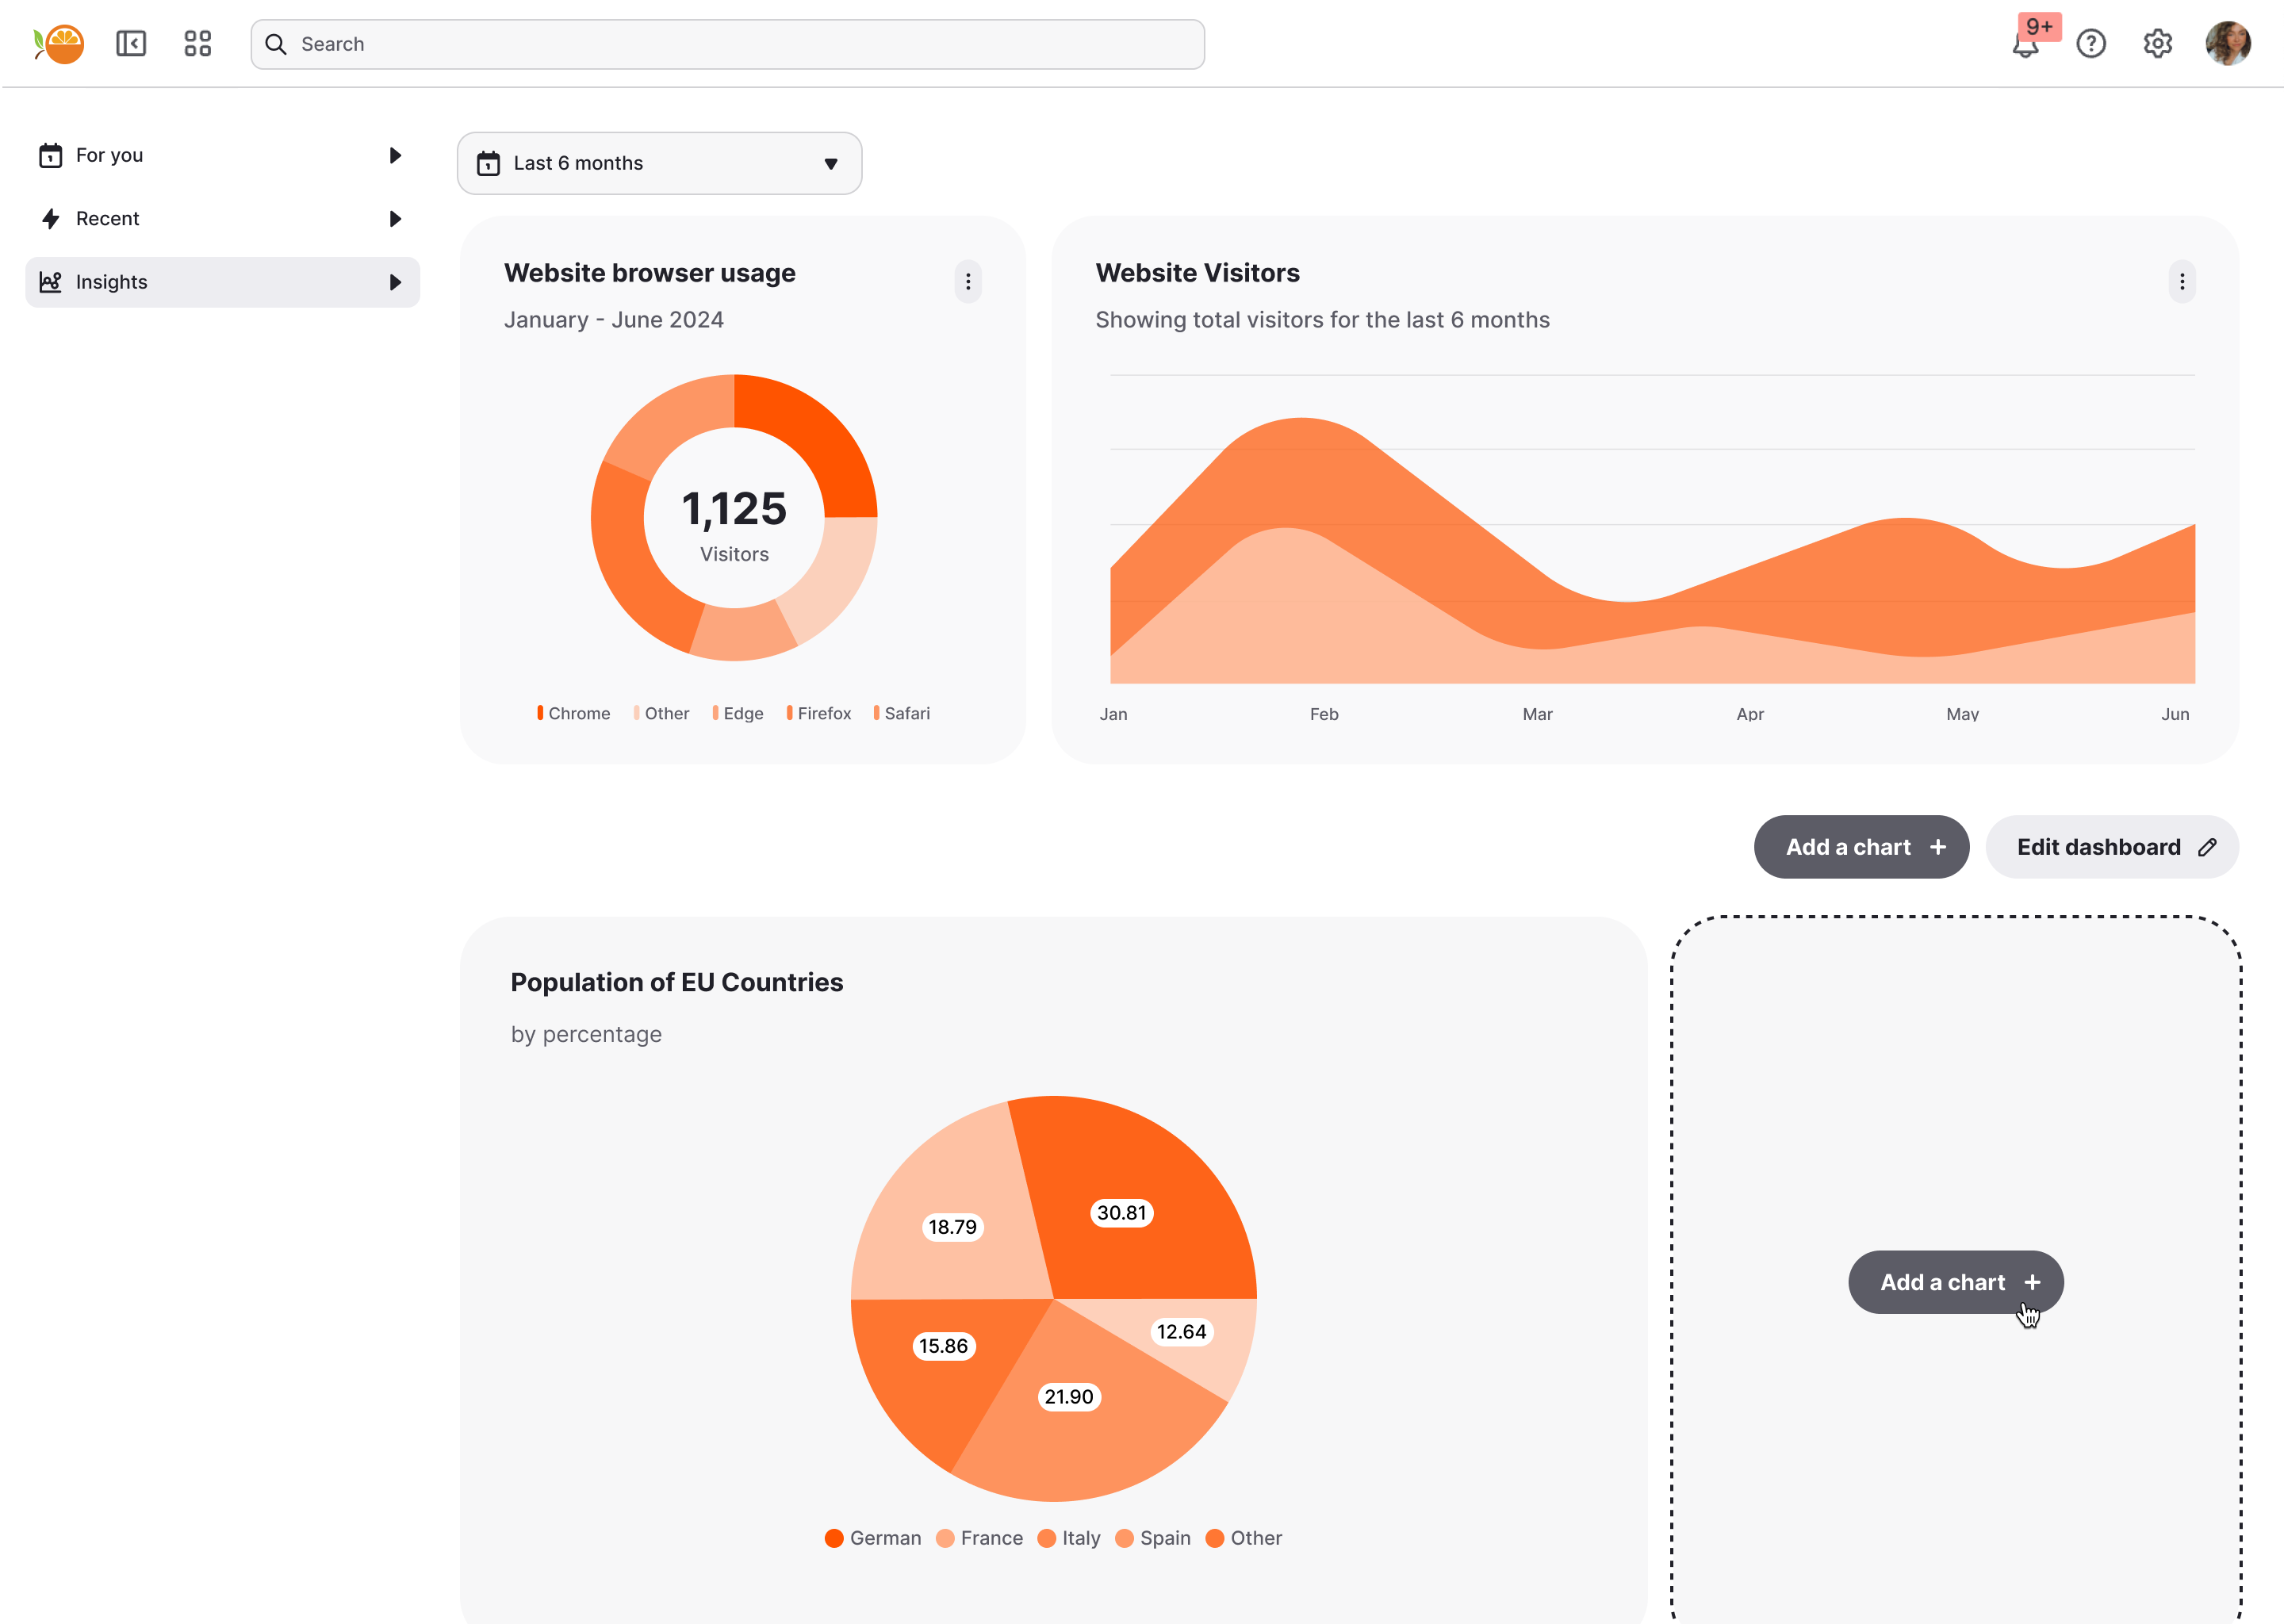
An Embeddable: the dashboard your team configures in Embeddable’s builder that you embed into your platform. The main canvas at the top of an Embeddable contains charts/tables/etc. configured by your team. And below the main canvas you can optionally define a Custom Canvas.

-
Custom Canvas: This is the optional canvas below the main canvas on an Embeddable that your end-users can extend / customize. You can define exactly one Custom Canvas on an Embeddable, and a Custom Canvas is just a definition of:
-
Datasets that the end-users should have access to for building their own dashboards.
-
Templates (i.e. charts, tables, etc.) that the end-users can use to build their dashboards.

-
-
Custom dashboard: this is what we call a dashboard built by an end user. Importantly, a custom dashboard is just an Embeddable where an end-user has customized the custom-canvas section with some charts/tables/etc.
-
Custom Canvas State: This is how, behind the scenes, Embeddable stores the state of each custom dashboard in its backend.
Default Custom Canvas behaviour
The default behaviour for Custom Canvas is that each end-user (defined by the unique id that you pass to the user key in Tokens API) is assigned one custom dashboard in the Custom Canvas State.
When a user first opens an Embeddable dashboard, they’ll see a blank canvas. As they add charts, tables, or other components, Embeddable saves those changes in the Custom Canvas State under their user ID.
The next time the user opens the same Embeddable dashboard, Embeddable retrieves their saved state and restores their custom dashboard exactly as they left it last.
This works great if you want each end-user to have their own custom dashboard, but often you may want something a little more powerful (e.g. you may want multiple end-users to see the same custom dashboard, or you want end-users to be able to create multiple custom dashboards).
This is where the customCanvasState key in Tokens API comes in.
Using customCanvasState and customCanvasReadOnly to customize behaviour
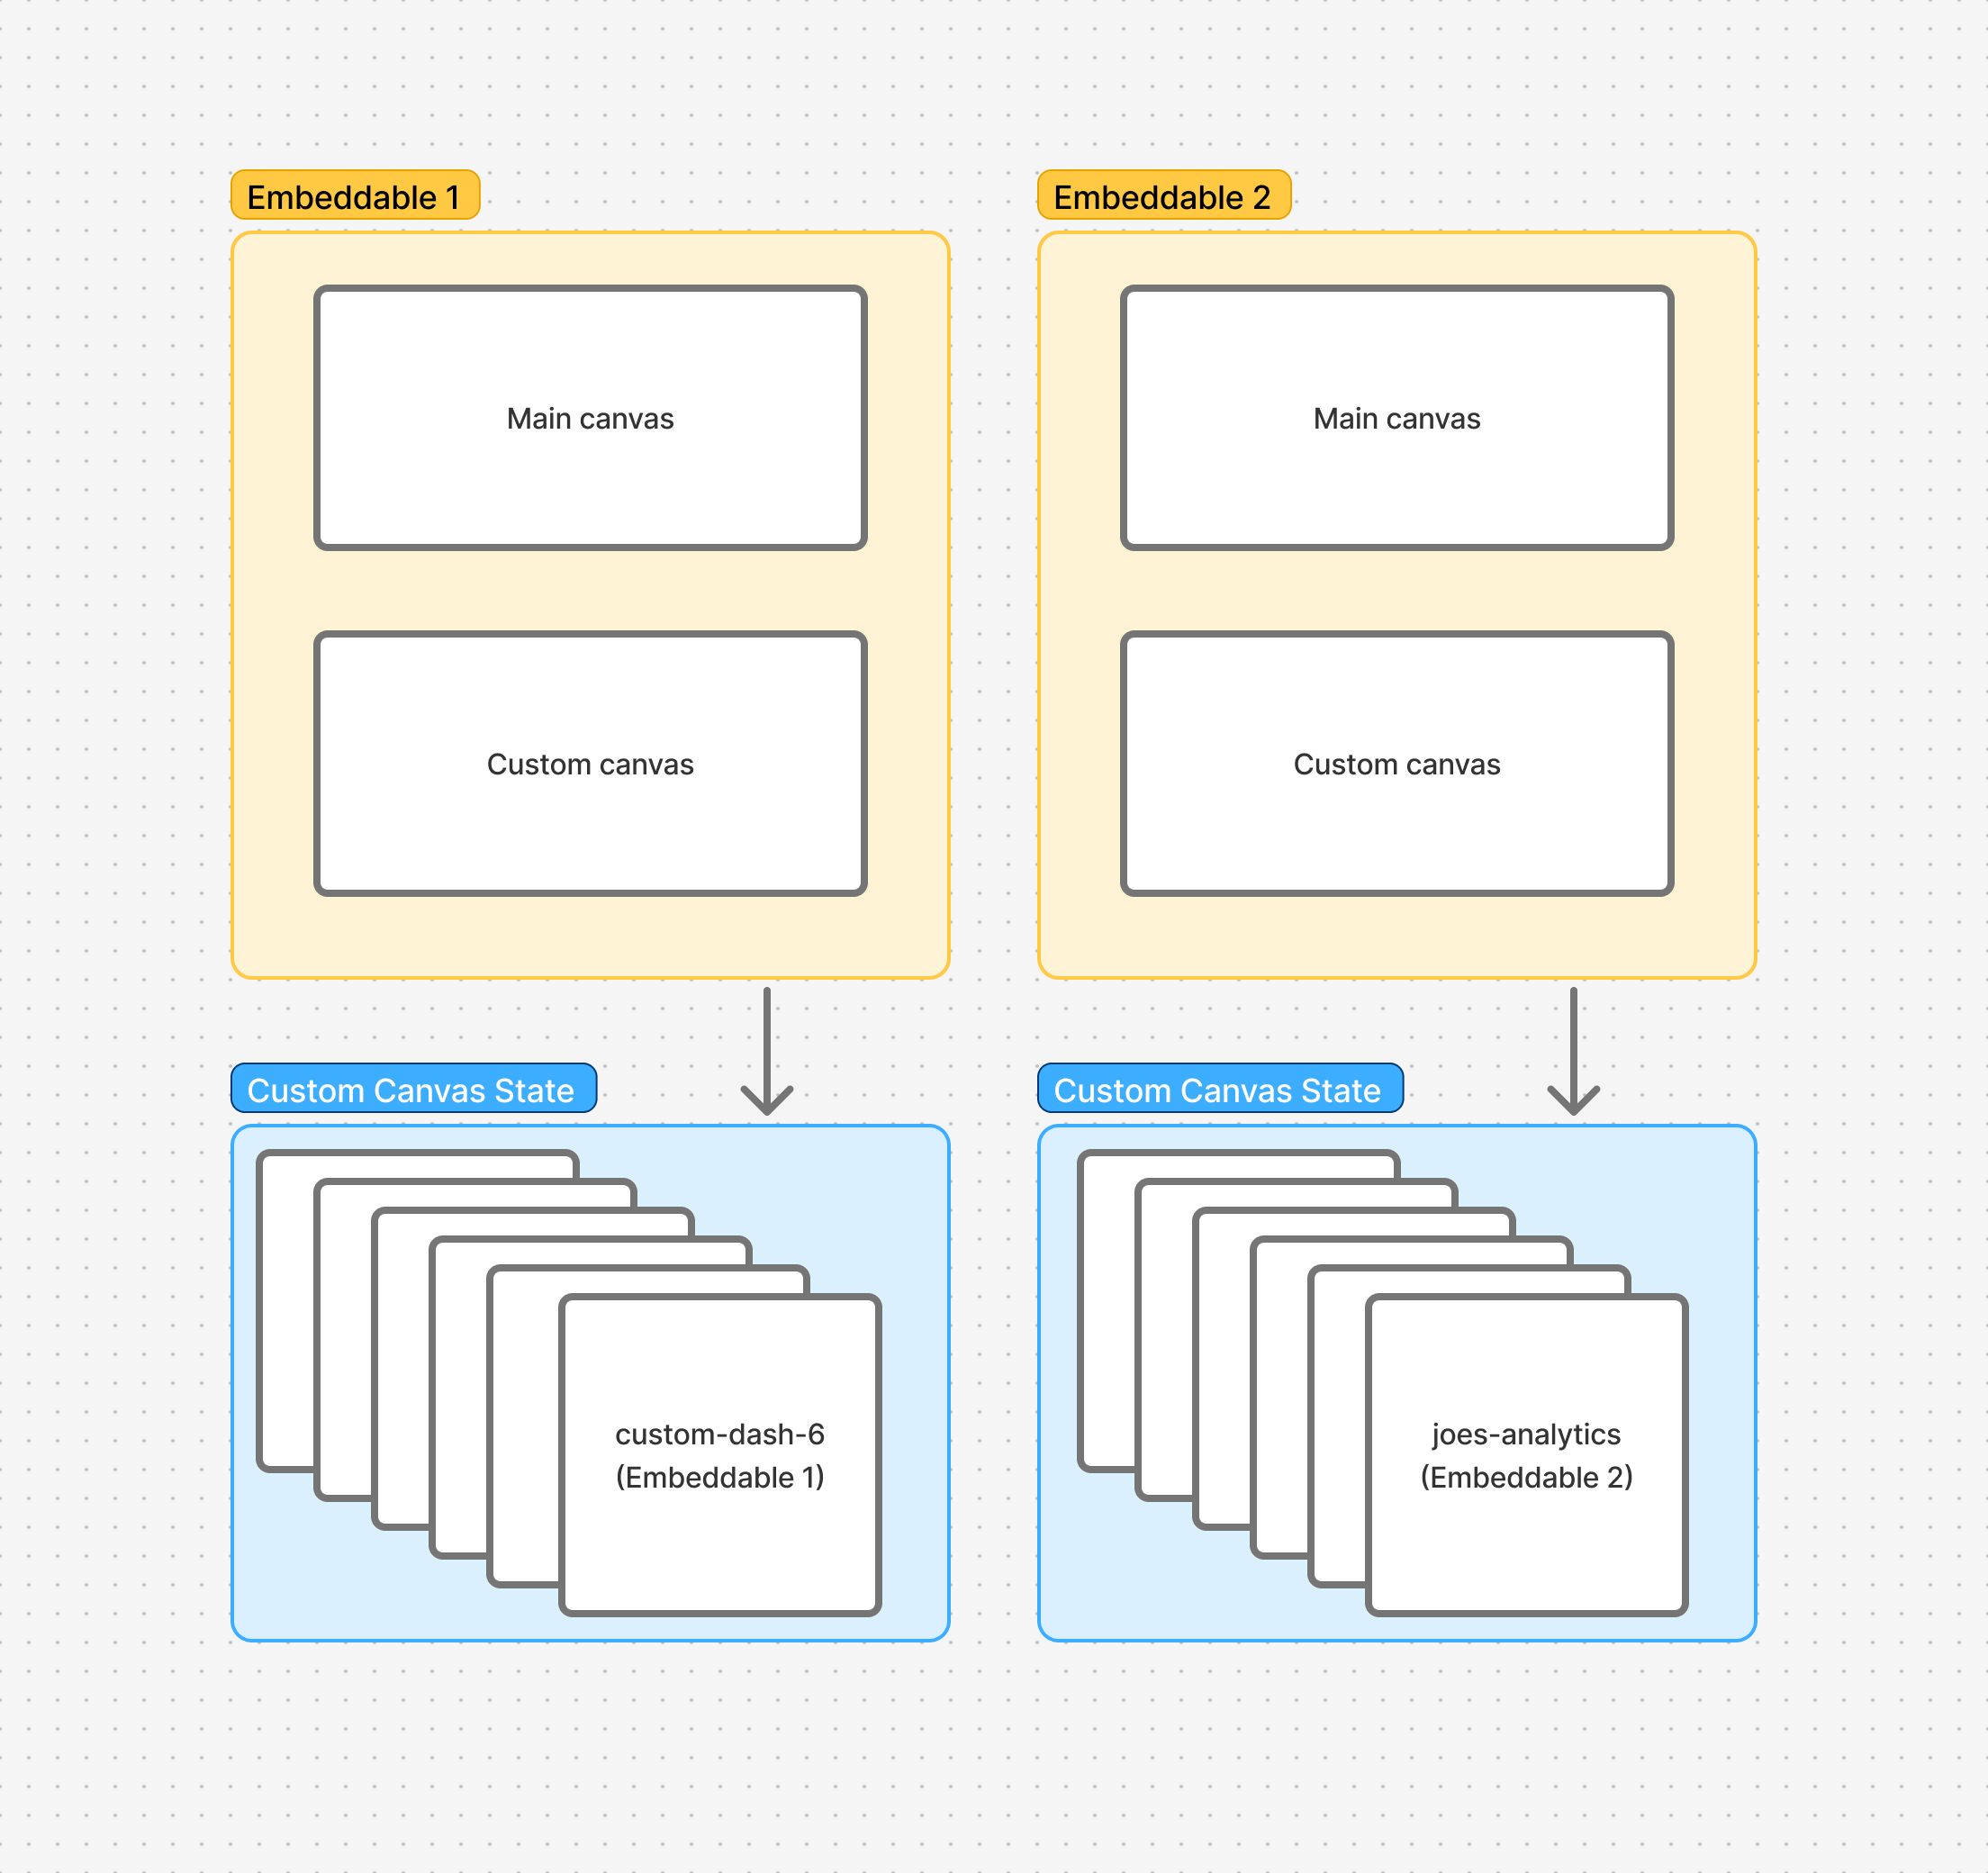
As shown below, each Embeddable can have its own Custom Canvas and thus Custom Canvas State. Each custom dashboard is stored as a state object, against a unique string key (e.g. "custom-dash-6" or "joes-analytics") in the Custom Canvas State.
The Tokens API is used to generate a token that tells Embeddable what dashboard to render in your application. It has various important fields, but we’ll focus here on three in particular:
embeddableIdtells Embeddable which Embeddable dashboard to load.customCanvasStatetells Embeddable which custom dashboard to load (from Custom Canvas State) onto the custom canvas.customCanvasReadOnlytells Embeddable whether it should be possible for the end-user viewing the dashboard to make changes to the custom canvas (defaults tofalsemeaning that, by default, the custom canvas part of the dashboard is editable).
fetch('https://api.<region>.embeddable.com/api/v1/security-token', {
  method: 'POST',
  headers: {
    // headers
  },
  body: JSON.stringify({
    embeddableId: "695281cd-3952-42f9-968f-25580fcd42f9",
    customCanvasState: 'custom-dash-6',
    customCanvasReadOnly: false
    //
    // other fields...
    //
  })
})
The customCanvasState is a string key that acts like a named save slot for a custom dashboard. Any changes an end-user makes to the canvas are automatically persisted on the Embeddable backend under this key. If customCanvasState is omitted from the Tokens API call, the user value will be used as the key instead.
When the dashboard loads, Embeddable looks up the saved state for the provided customCanvasState value and renders it. If you pass a key that Embeddable hasn’t seen before, that’s not an error — Embeddable simply treats it as a new custom dashboard and starts with a blank canvas.
This means you can create a new custom dashboard at any time by providing a new, unique customCanvasState string (unique per embeddableId). From that point forward, any edits the end-user makes will be saved under that key automatically.
The customCanvasReadOnly flag is also handy as it allows you to load a custom dashboard for an end-user to view, but without giving them the right to edit it. This allows you to have edit access for some users and read-only access for others.
Let’s look at some use cases to better understand how these keys work together.
Use Cases
The following describes common use-cases of Custom Canvas and what you should pass to the Tokens API in order to achieve that use-case. Note that in most cases you’re likely using IDs (e.g. user IDs or tenant IDs) from your own database to pass to customCanvasState. In some cases you may even want to define new tables and columns in your own application database and manage the keys there.
Dashboard per end-user
If you simply want every end-user in your platform to see their own private custom dashboard you can easily achieve this by passing a unique identifier for that user (e.g. user id or email) to the customCanvasState field. That way a different state will be allocated to each end user. This is also the default behaviour if customCanvasState is omitted (i.e. in that case the user value passed to Tokens API will be used as the customCanvasState value too).
A single analytics dashboard per tenant
This is where you want each customer, who may have multiple end-users, to see the same custom dashboard. In this case, simply pass the tenant ID (e.g. organisation_id, team_id, school_id, etc.) to customCanvasState. That way every end-user from that tenant will see the same custom dashboard. If you want to allow some users to edit the custom dashboard and some end-users to only view it, simply pass true or false to customCanvasReadOnly depending on the user’s permissions.
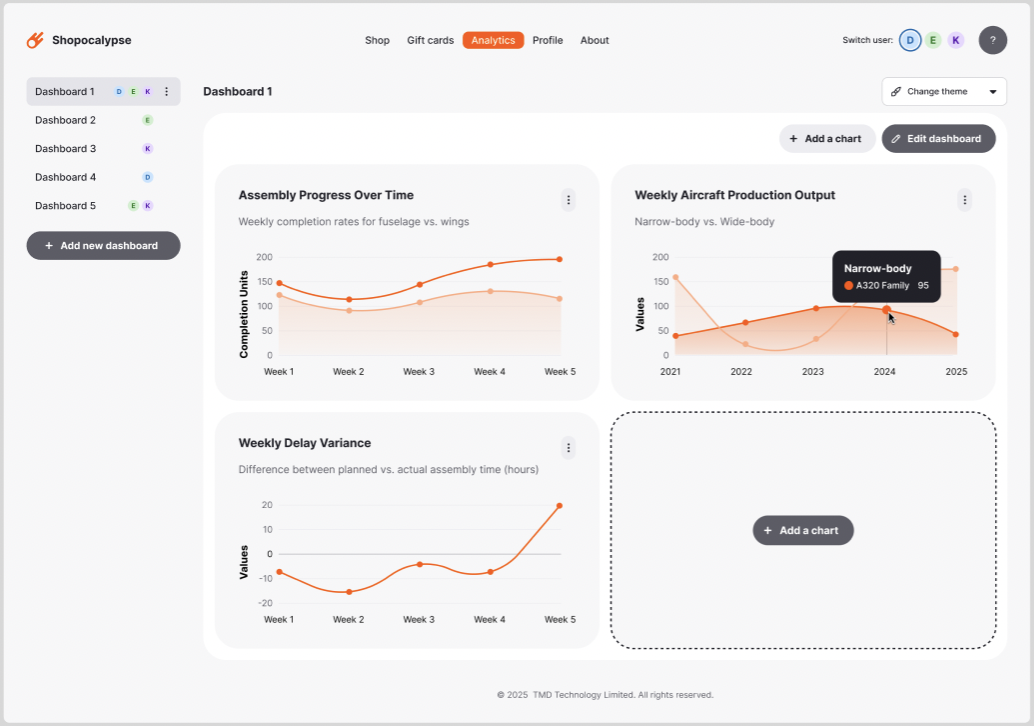
An "add new dashboard" button
This is a popular use case whereby you want to allow end-users to build as many custom dashboards as they like. A typical flow might be:
- Users are presented with an "Add new dashboard" button.
- When they click the button, they can name the dashboard, and a new, empty dashboard (blank custom canvas) is presented to them.
- They can then add charts/tables/etc to it.
- When they next return, the custom dashboard they created is available for them to open, edit or even delete.
- Alternatively, they can click "Add new dashboard" again to create a new one.
To achieve this there are a few implementation steps you will need to take:
- In your own application database (not necessarily the one Embeddable is connected to) you’ll want to create a table to store all the custom dashboards that your end-users create. E.g.
table dashboards(id, name, embeddable_id, custom_canvas_state, created_at, deleted_at) - Then, whenever a user clicks the "Add new dashboard" button, on your backend, generate a new unique UUID (or unique id) to represent the
customCanvasStateand then create a new row in yourdashboardstable containing those values (e.g.insert into dashboards (name, embeddable_id, custom_canvas_state, created_at) values ('Untitled', '<embeddableId>', randomUUID(), now())).- Perhaps you’ll also ask the user for the
nameof the new dashboard upfront. - And if you have multiple Embeddables with Custom Canvas enabled, perhaps you’ll even give the user a choice of which Embeddable to use (e.g. depending on the data they want to access).
- Perhaps you’ll also ask the user for the
- Now you can render the new dashboard for the user by generating a
tokenwith the Tokens API, passing theembeddableIdandcustomCanvasStatevalues from the newdashboardsrow you’ve created. - You use that
tokento render a dashboard, where user can build their dashboard (Embeddable will automatically keep track of any changes they make). - To show the list of custom dashboards to your users in your interface, simply retrieve them from your
dashboardstable and render, for example, theirnamefor each item. When a user clicks to open one, again, generate a newtokenand use it to render the dashboard. - If a user wants to rename their custom dashboard simply update the
namein yourdashboardstable. - If a user wants to delete their
custom dashboardsimply set thedeleted_atfield in yourdashboardsrow.
To access the source code of a working example of the above flow, click here: (COMING SOON).
Team dashboards
A common use-case is that you want users to be able to create custom dashboards, and then you want to enable other users to view, or even edit, those dashboards. Perhaps you want a permissions system in place too, where only certain users can see certain dashboards, and some users have edit permissions while others can only view.
This is easy to achieve in Embeddable, but it’s important to note that Embeddable focuses on one job: rendering the dashboard. This gives you the power to make permissions work however you like.
E.g:
- To manage permissions for who can access which dashboard, simply hold this relationship in your application database. E.g.
table dashboard_permissions(id, user_id, dashboard_id, created_at, deleted_at). And then, for each user, only show them the dashboards that have a matching row for theiruser_idin this table. And to invite users to a dashboard, simply add a row to the table with theiruser_idand thedashboard’sidas thedashboard_id. - To manage read/write access for who can edit a dashboard vs just view it, simply add a
has_write_accessboolean to thedashboard_permissionstable described above, and then use that value to set thecustomCanvasReadOnlyfield on the Tokens API.
To access the source code of a working example of Team Dashboards, click here: (COMING SOON).