Building Custom Canvas
Custom Canvas is designed to give your users flexibility—while keeping you, the builder, fully in control of the datasets, templates, and rules they can use.
Like any dashboard, you can build it two ways: visually in the no-code builder (below), or as code with a customCanvas block in your .embeddable.yml. Both configure exactly the same things. This page covers the no-code builder — skip to building it in code for the YAML.
Activate Custom Canvas
Turn on Custom Canvas by using the toggle beneath your main canvas. This opens up configuration options specific to user-created dashboards.

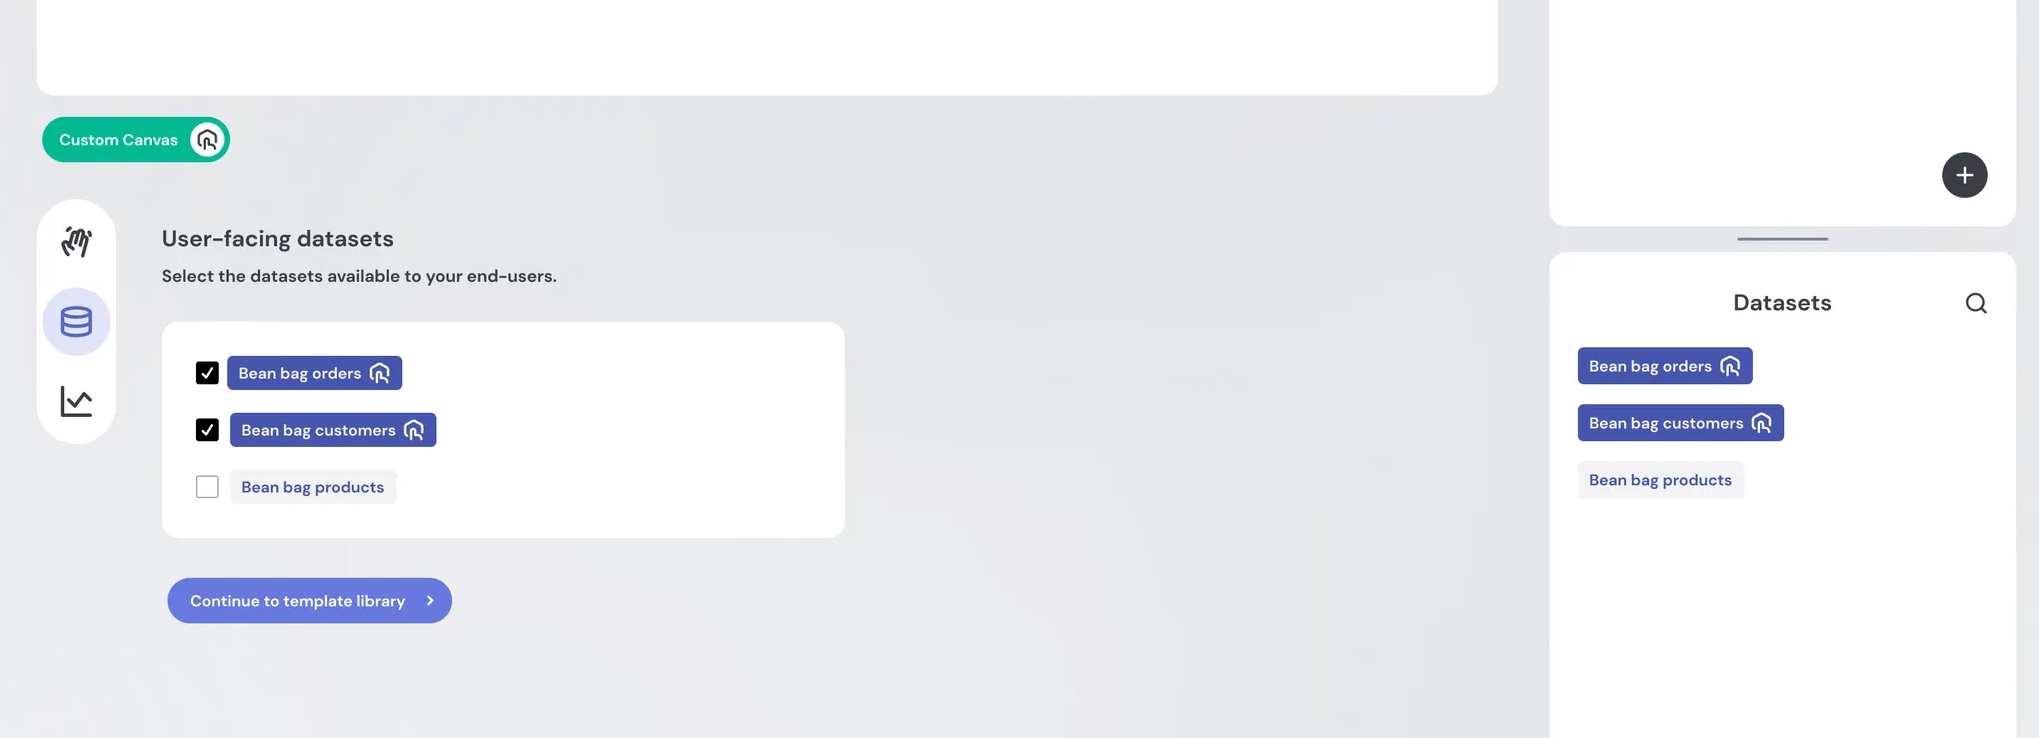
Select available datasets
In the Datasets section, select which datasets your users should be able to access.
- Datasets available to your users are highlighted in bright purple.
- This makes it easy to distinguish between data powering your main dashboards and the data you want to expose for user exploration.
Your data team can apply fine-grained control over what dimensions and measures are available to end-users using Views and Access Policies.
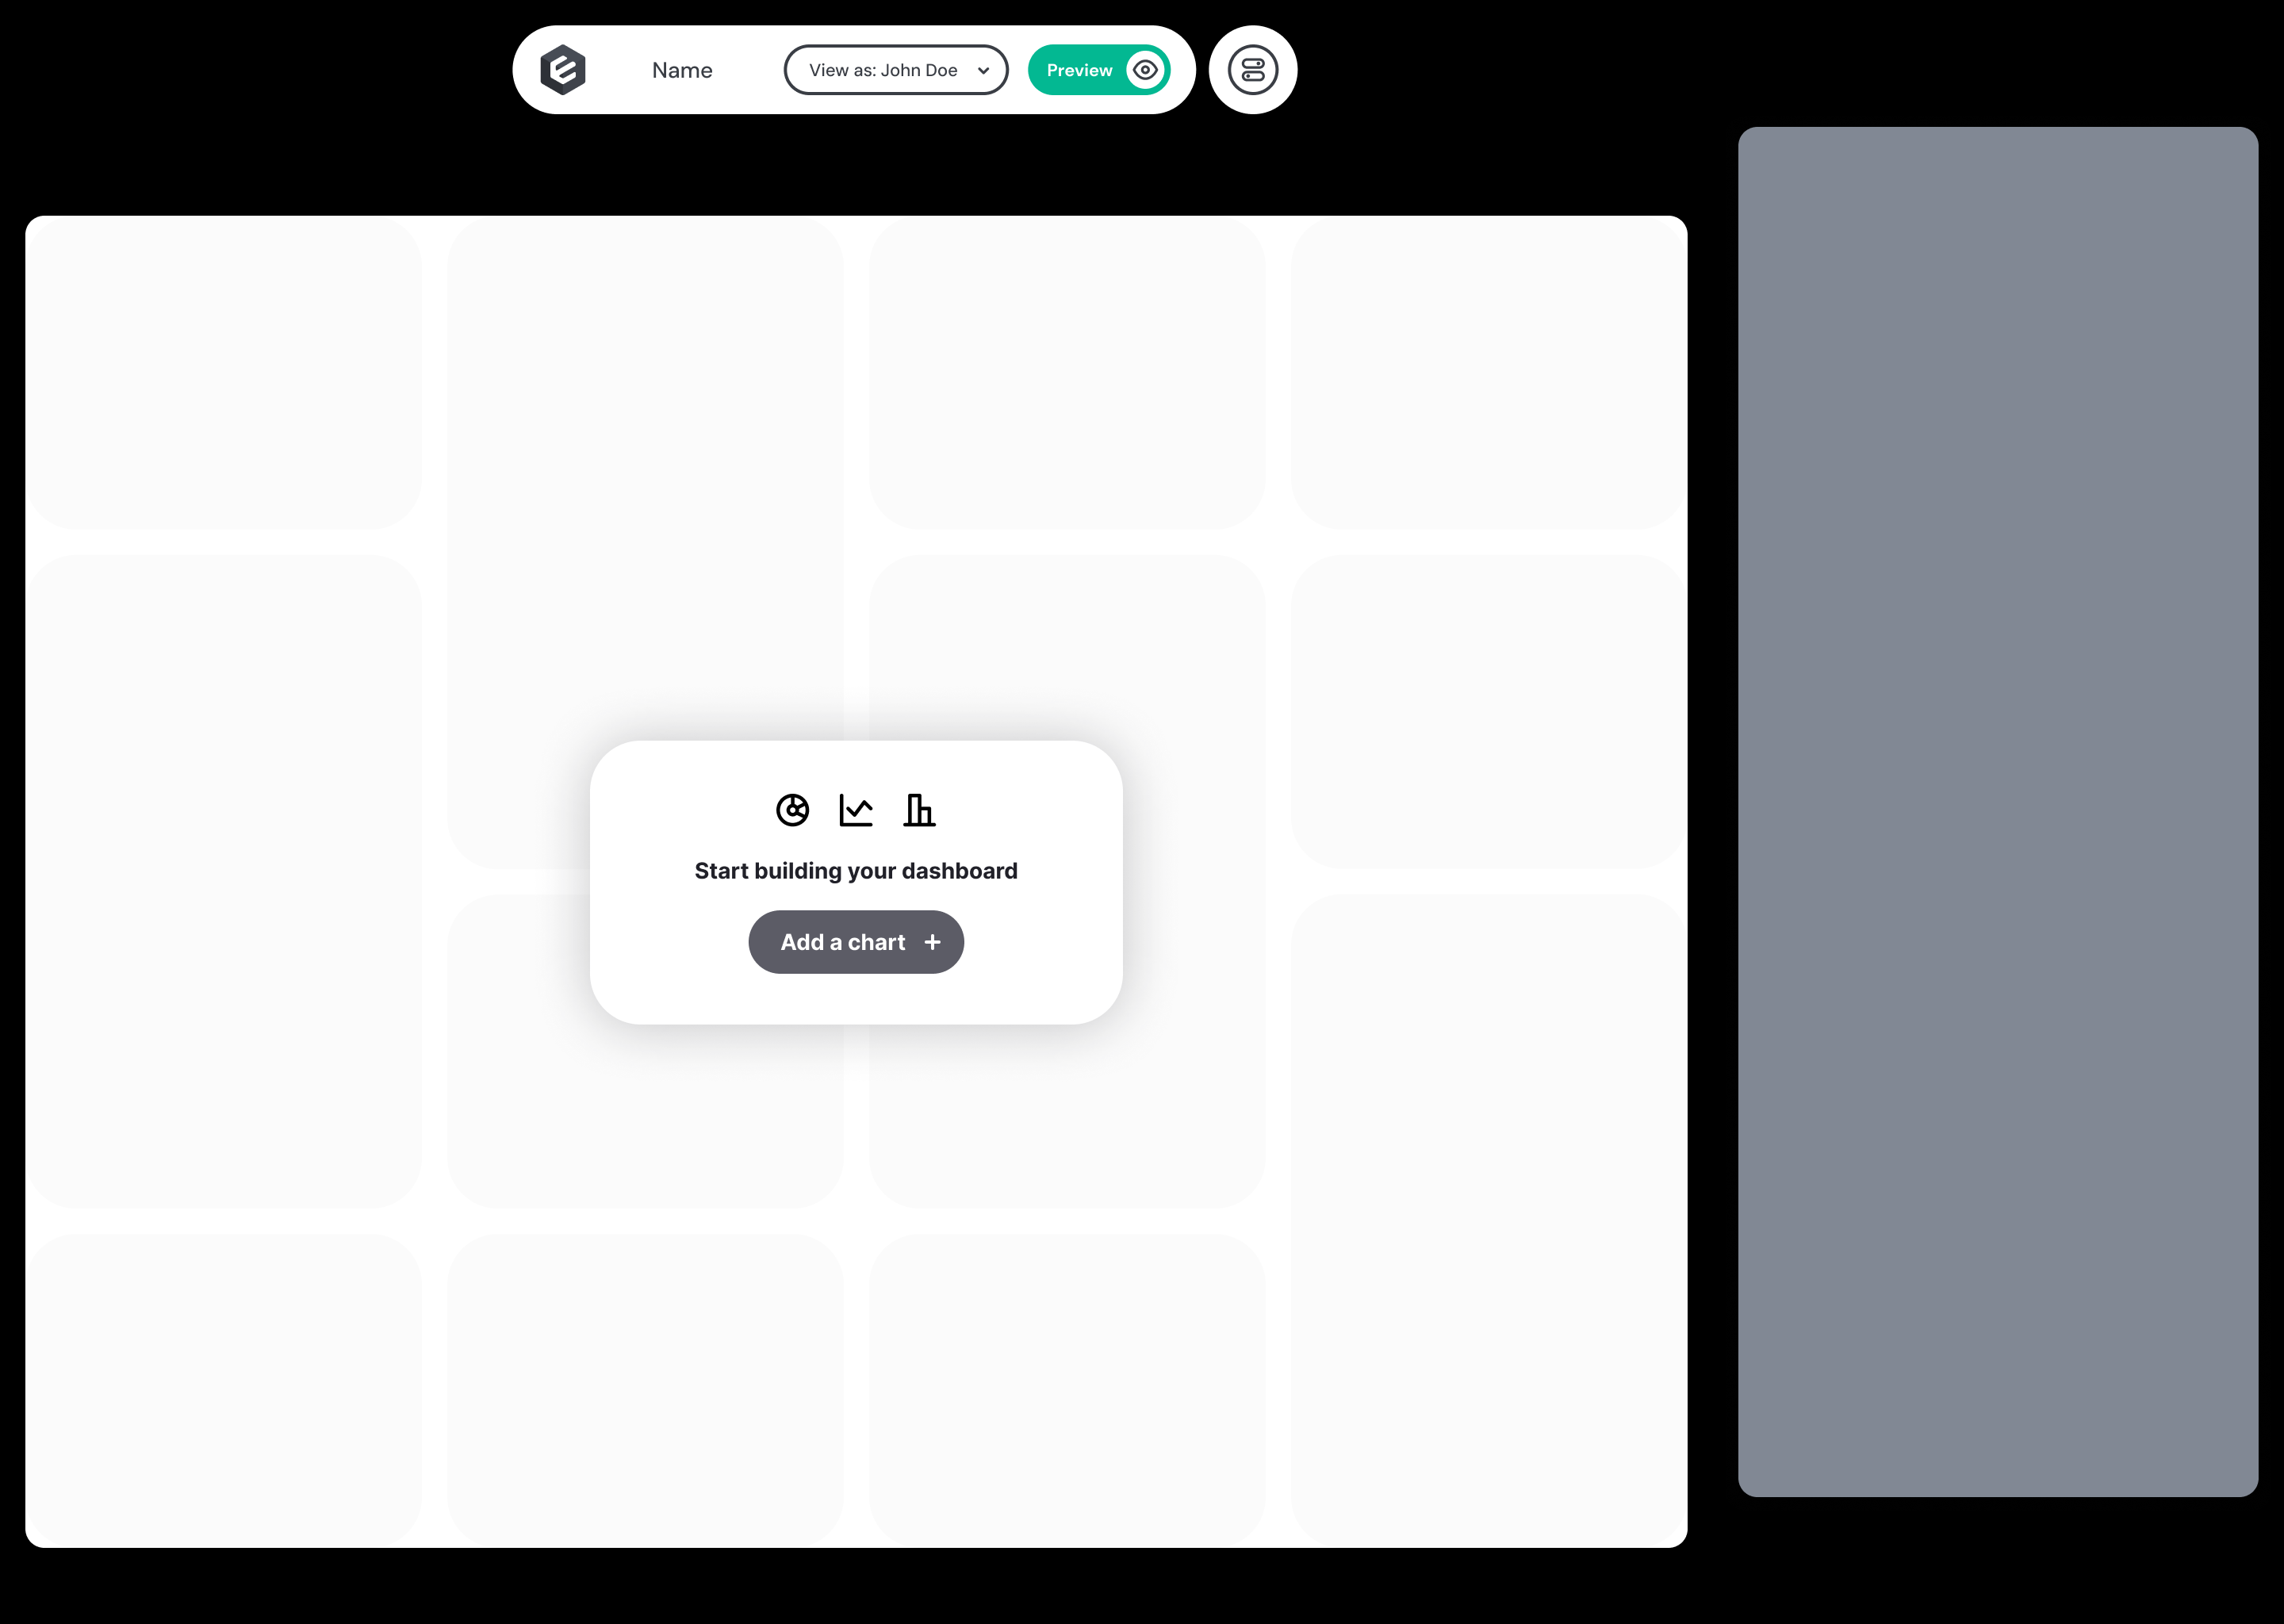
Build a library of templates
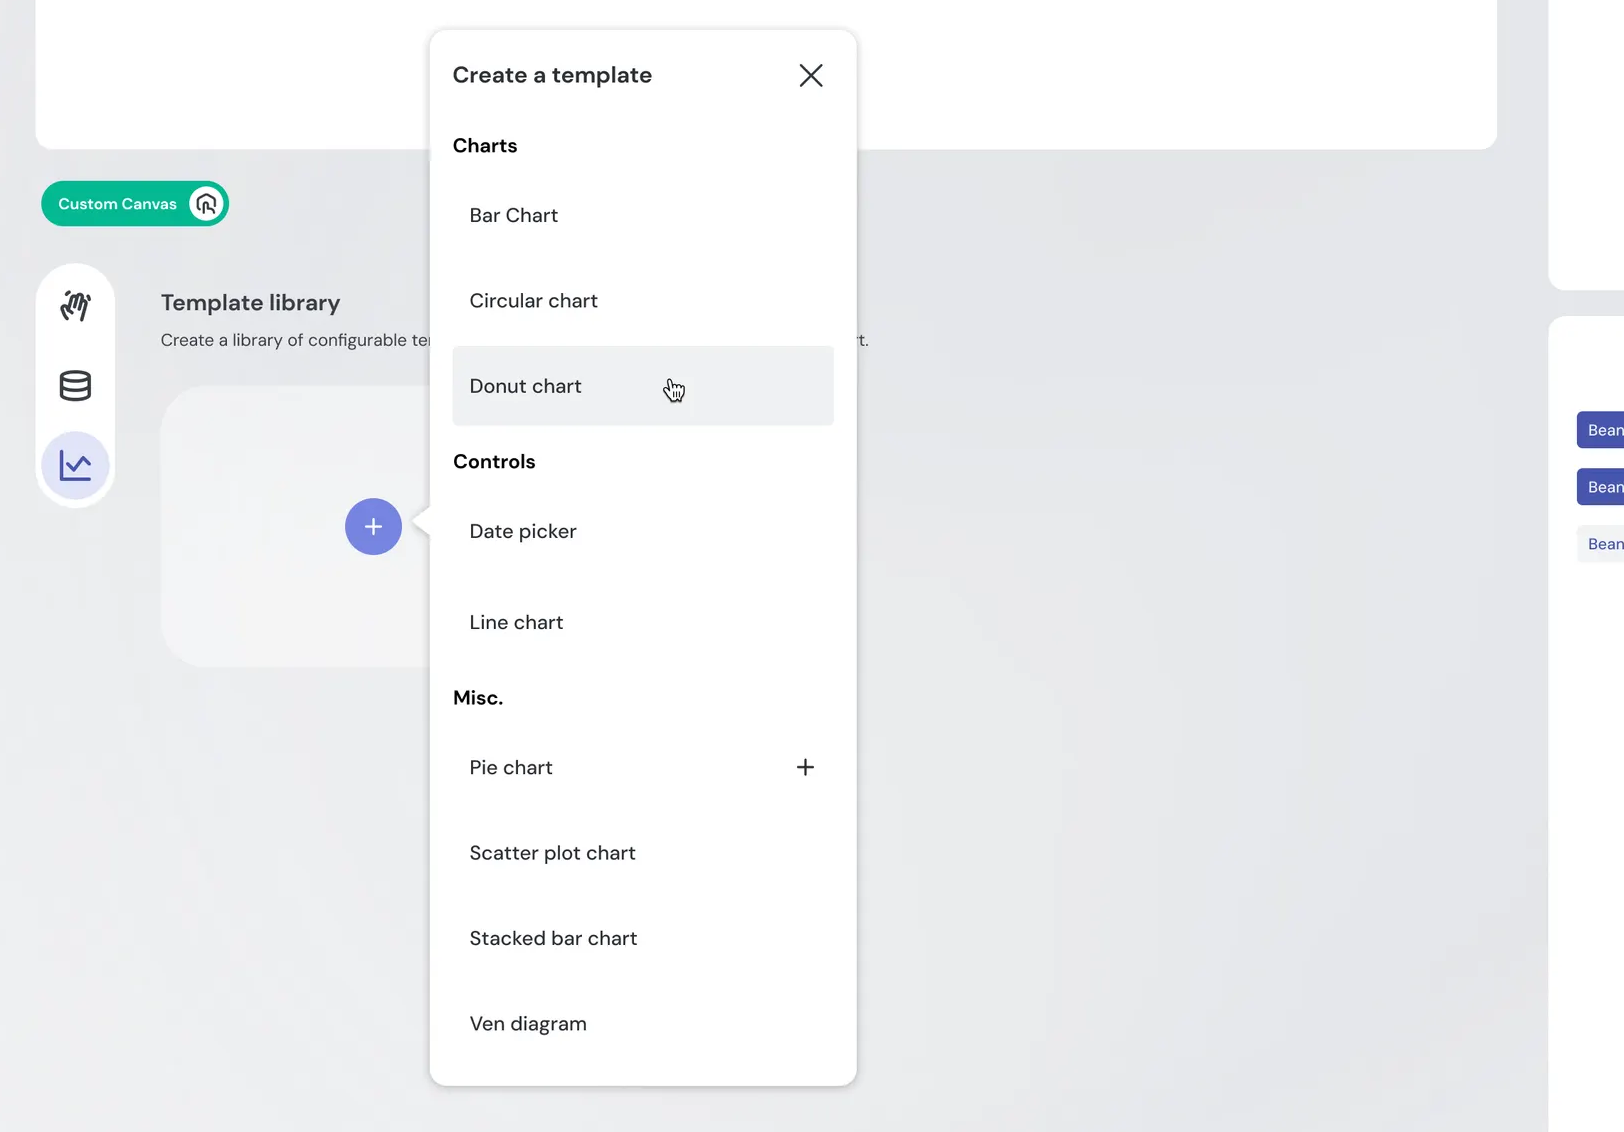
Next, go to the Template Library tab to create reusable templates. These come from your existing component library (e.g., pie chart, donut chart, bar chart).
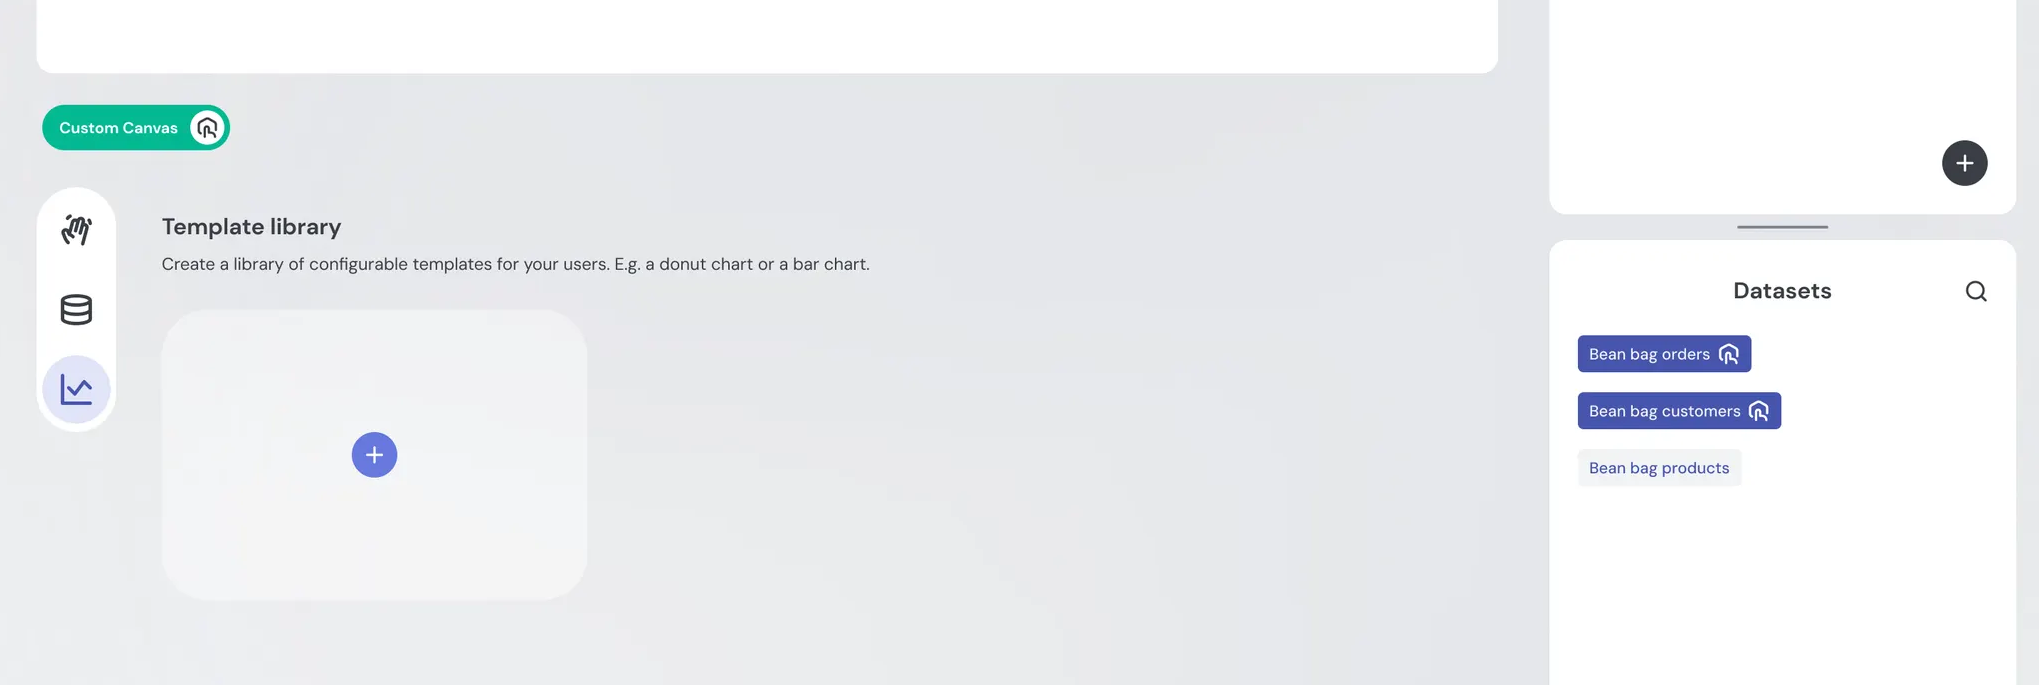
Start by selecting a chart from your component library
Configure chart inputs
Define the fields your users will interact with when creating their charts:
- Pre-populate fields for a guided experience.
- Leave fields empty to give users freedom.
- Hide fields entirely to keep complexity out of sight.
This balance lets you control how much flexibility users have.
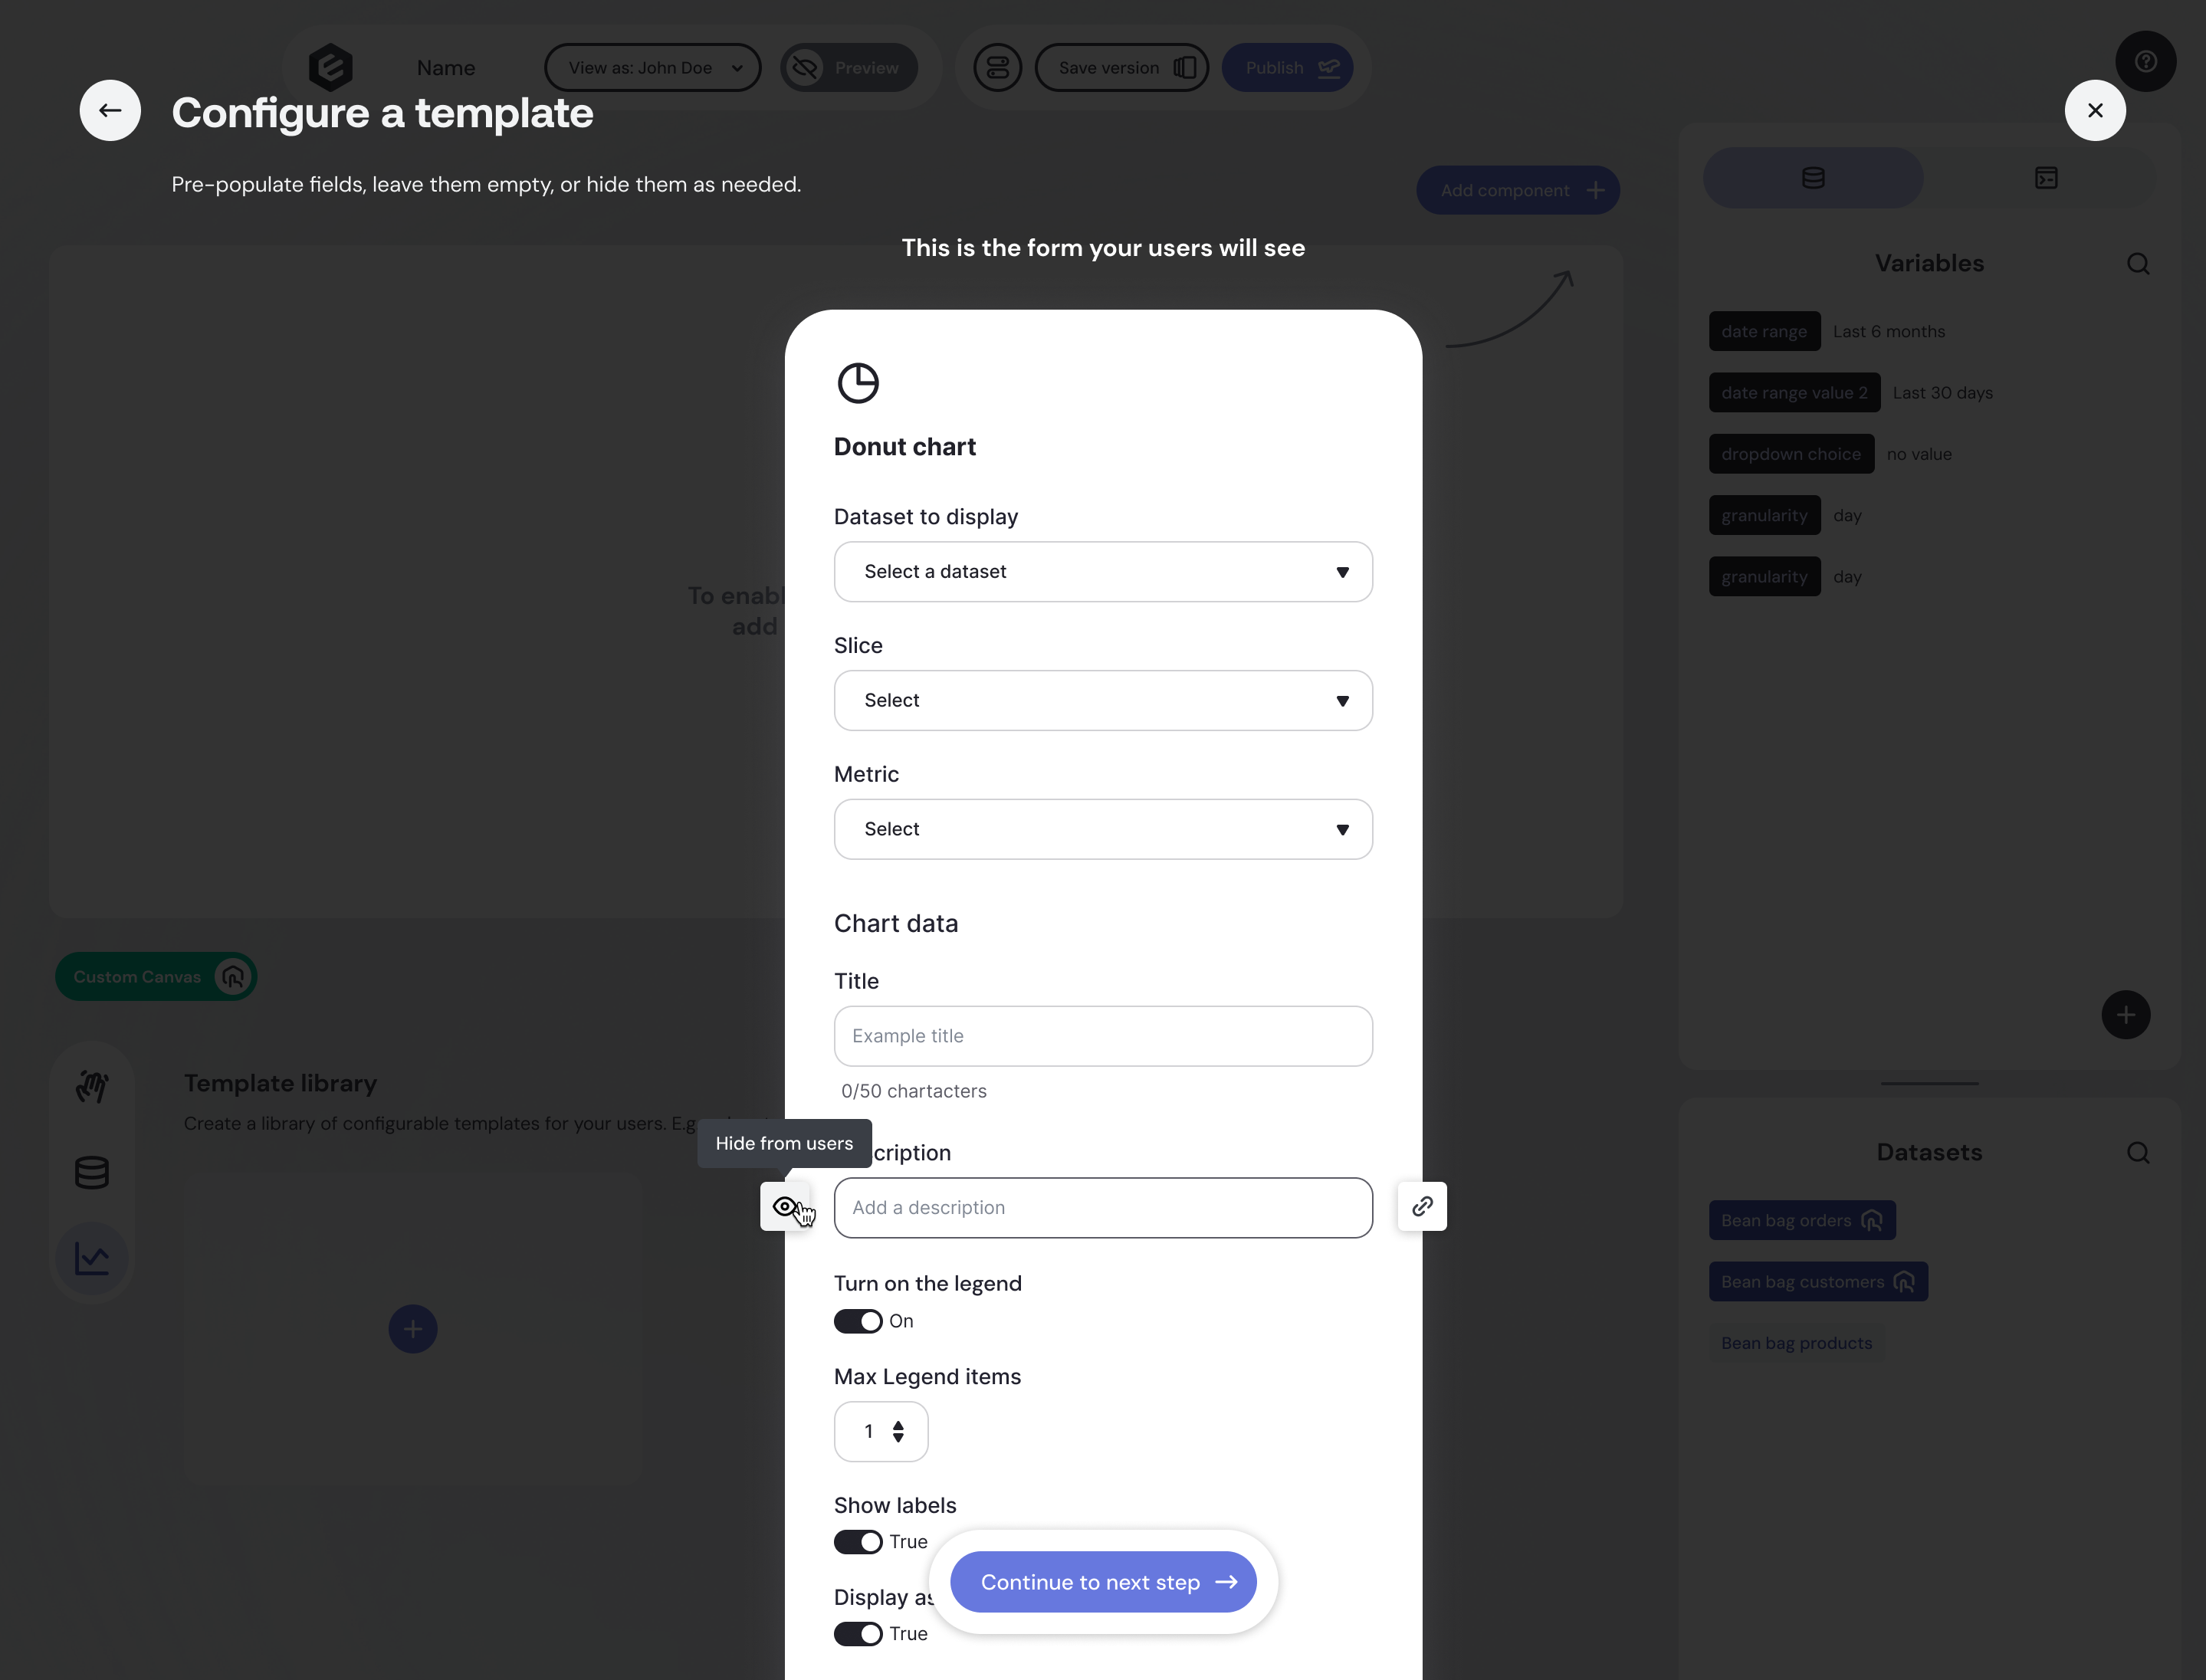
Your templates can be connected to variables that are manipulated by various controls (dropdowns, datepickers, etc) just like in regular dashboards. Simply attach inputs to variables as you would normally, and they'll carry through in your templates.
Best practice: keep your controls in the standard section of your dashboard, rather than in the Custom Canvas area. We don't recommend adding controls as templates to the Custom Canvas template library, as they will not necessarily work correctly (and may lead to a confusing user experience).
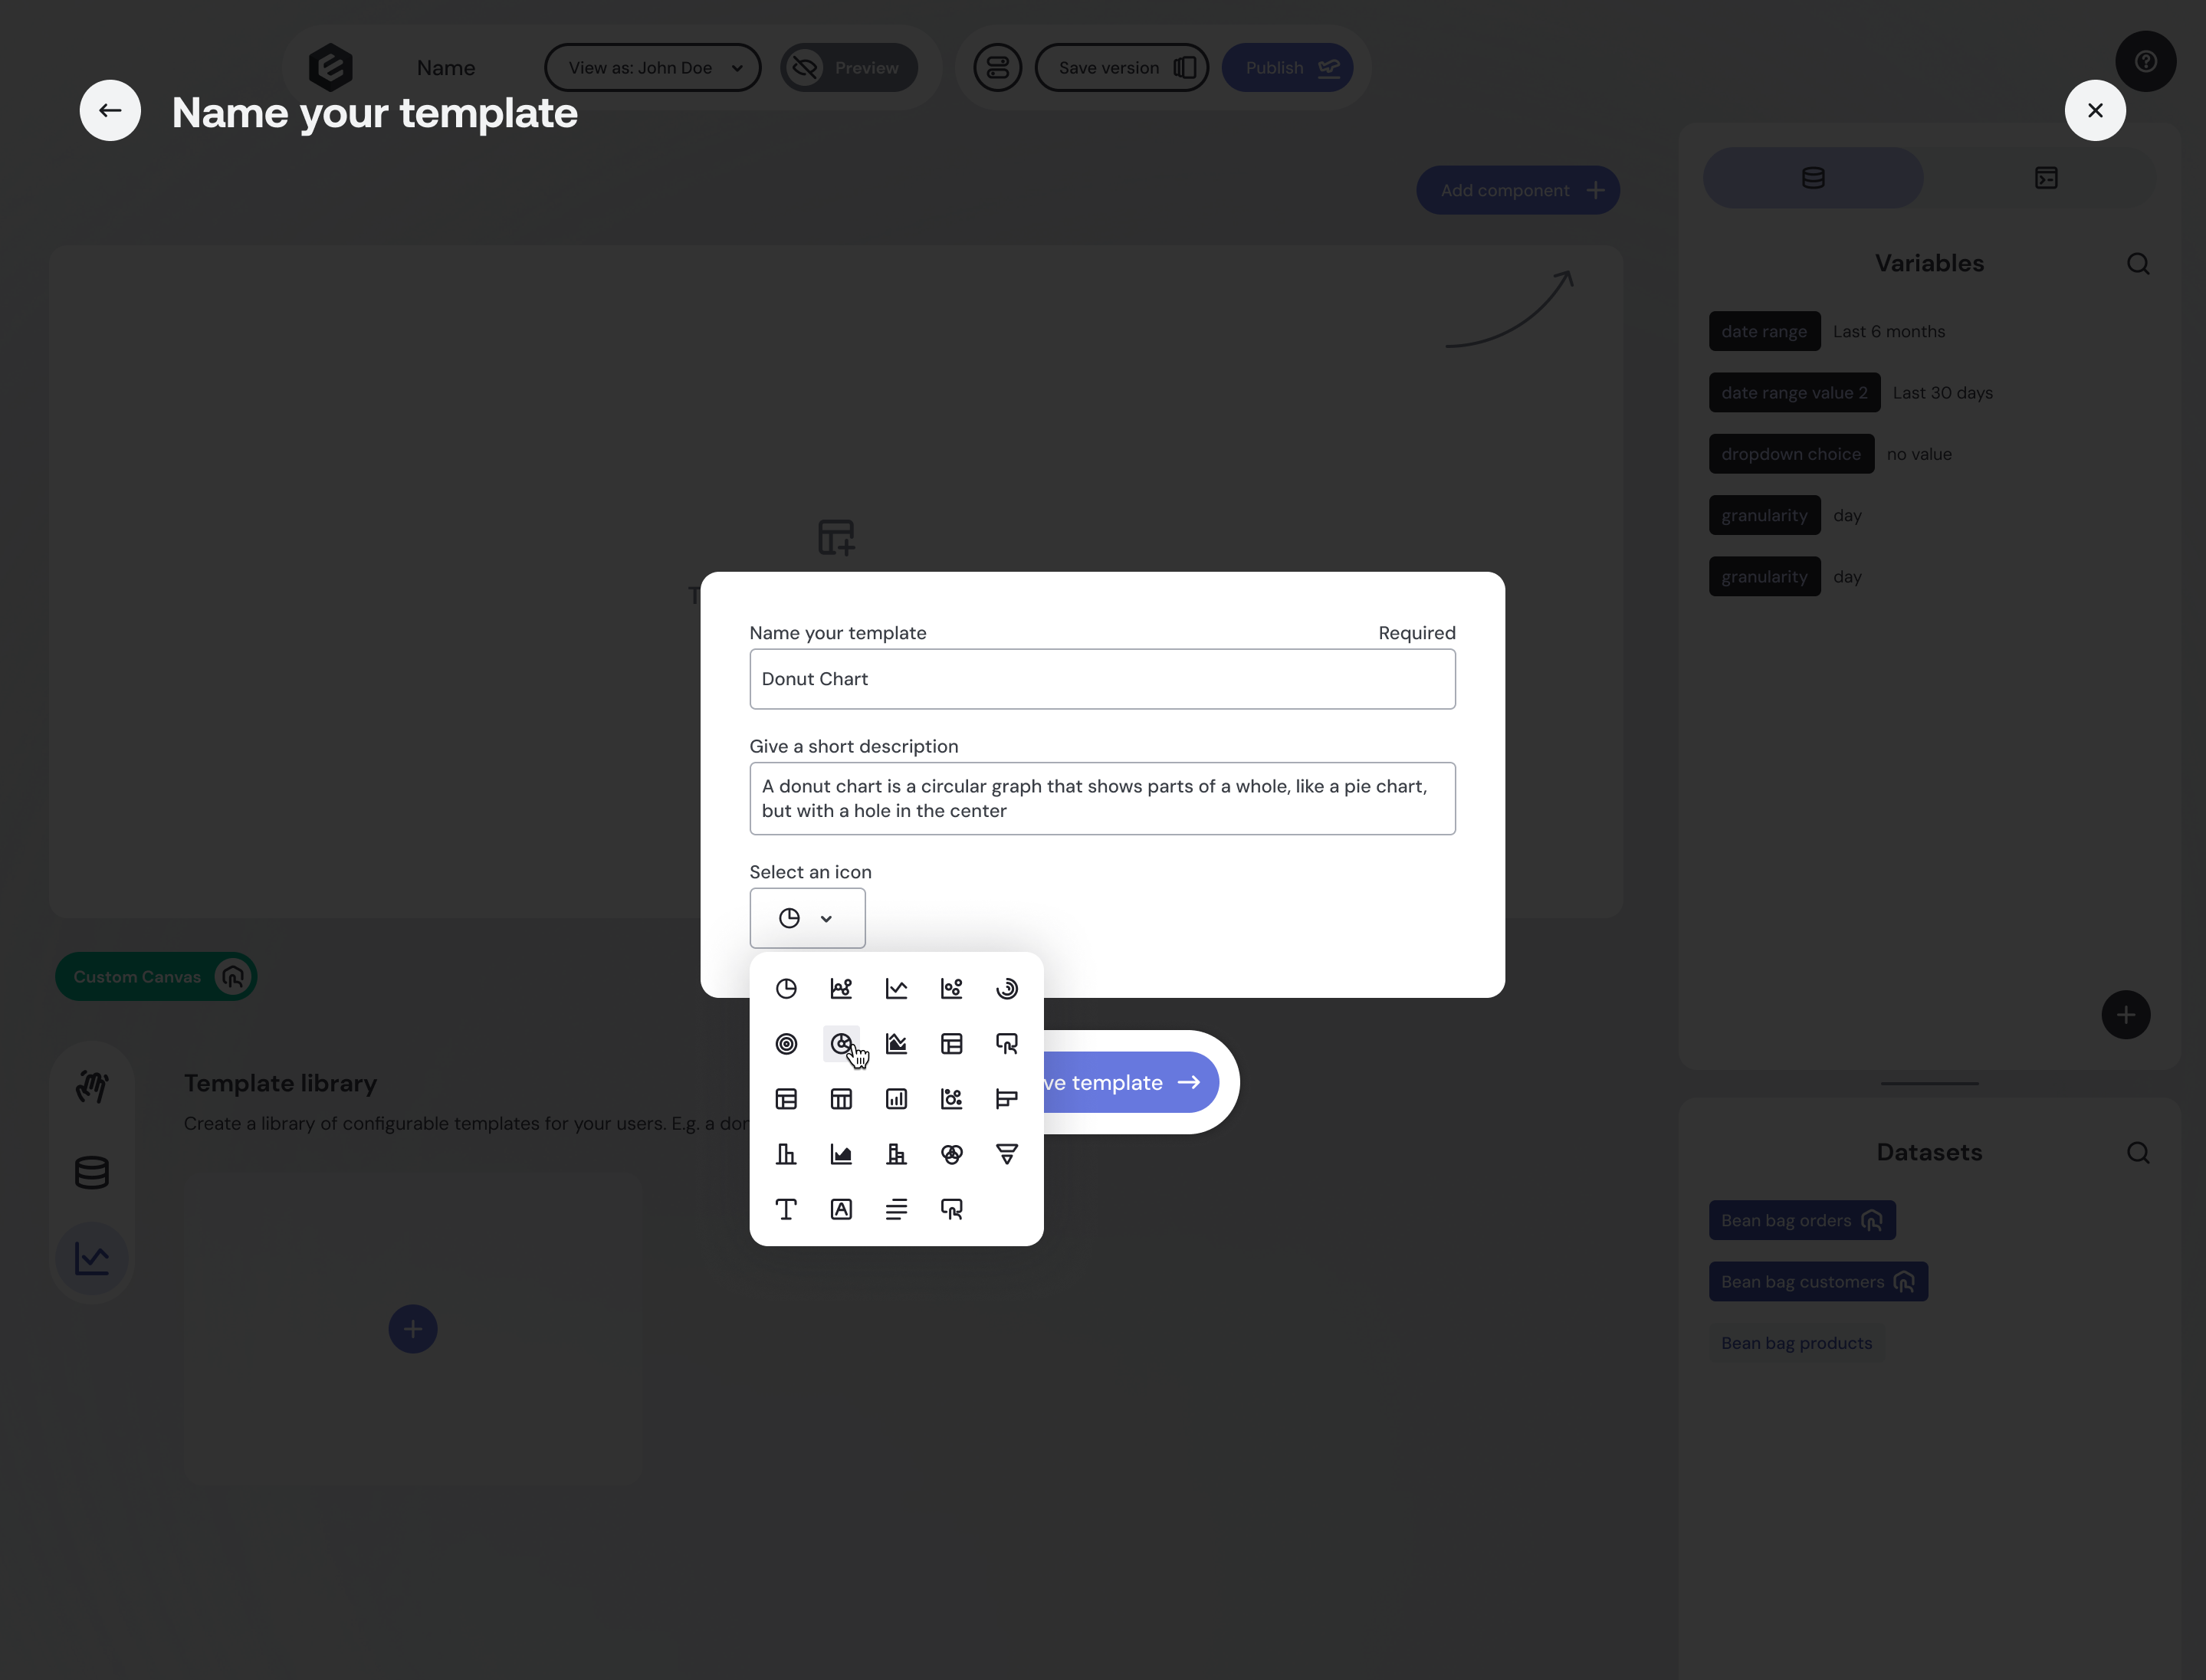
Name and describe templates
Give each template:
- A name
- An optional description
- A distinctive icon
This helps users easily differentiate between chart types when building dashboards.
Manage and organize templates
All configured templates appear on your dashboard builder page, below your main dashboard.
- Add as many templates as you like.
- Manage templates easily using the on-hover controls.

Set up a Starter Canvas (optional)
A Starter Canvas lets you define a default dashboard layout that end-users see the first time they open their custom canvas. Instead of facing a blank canvas, they start with a pre-built set of charts they can immediately explore and customize.
Open the Starter Canvas tab in the left sidebar of the dashboard builder.
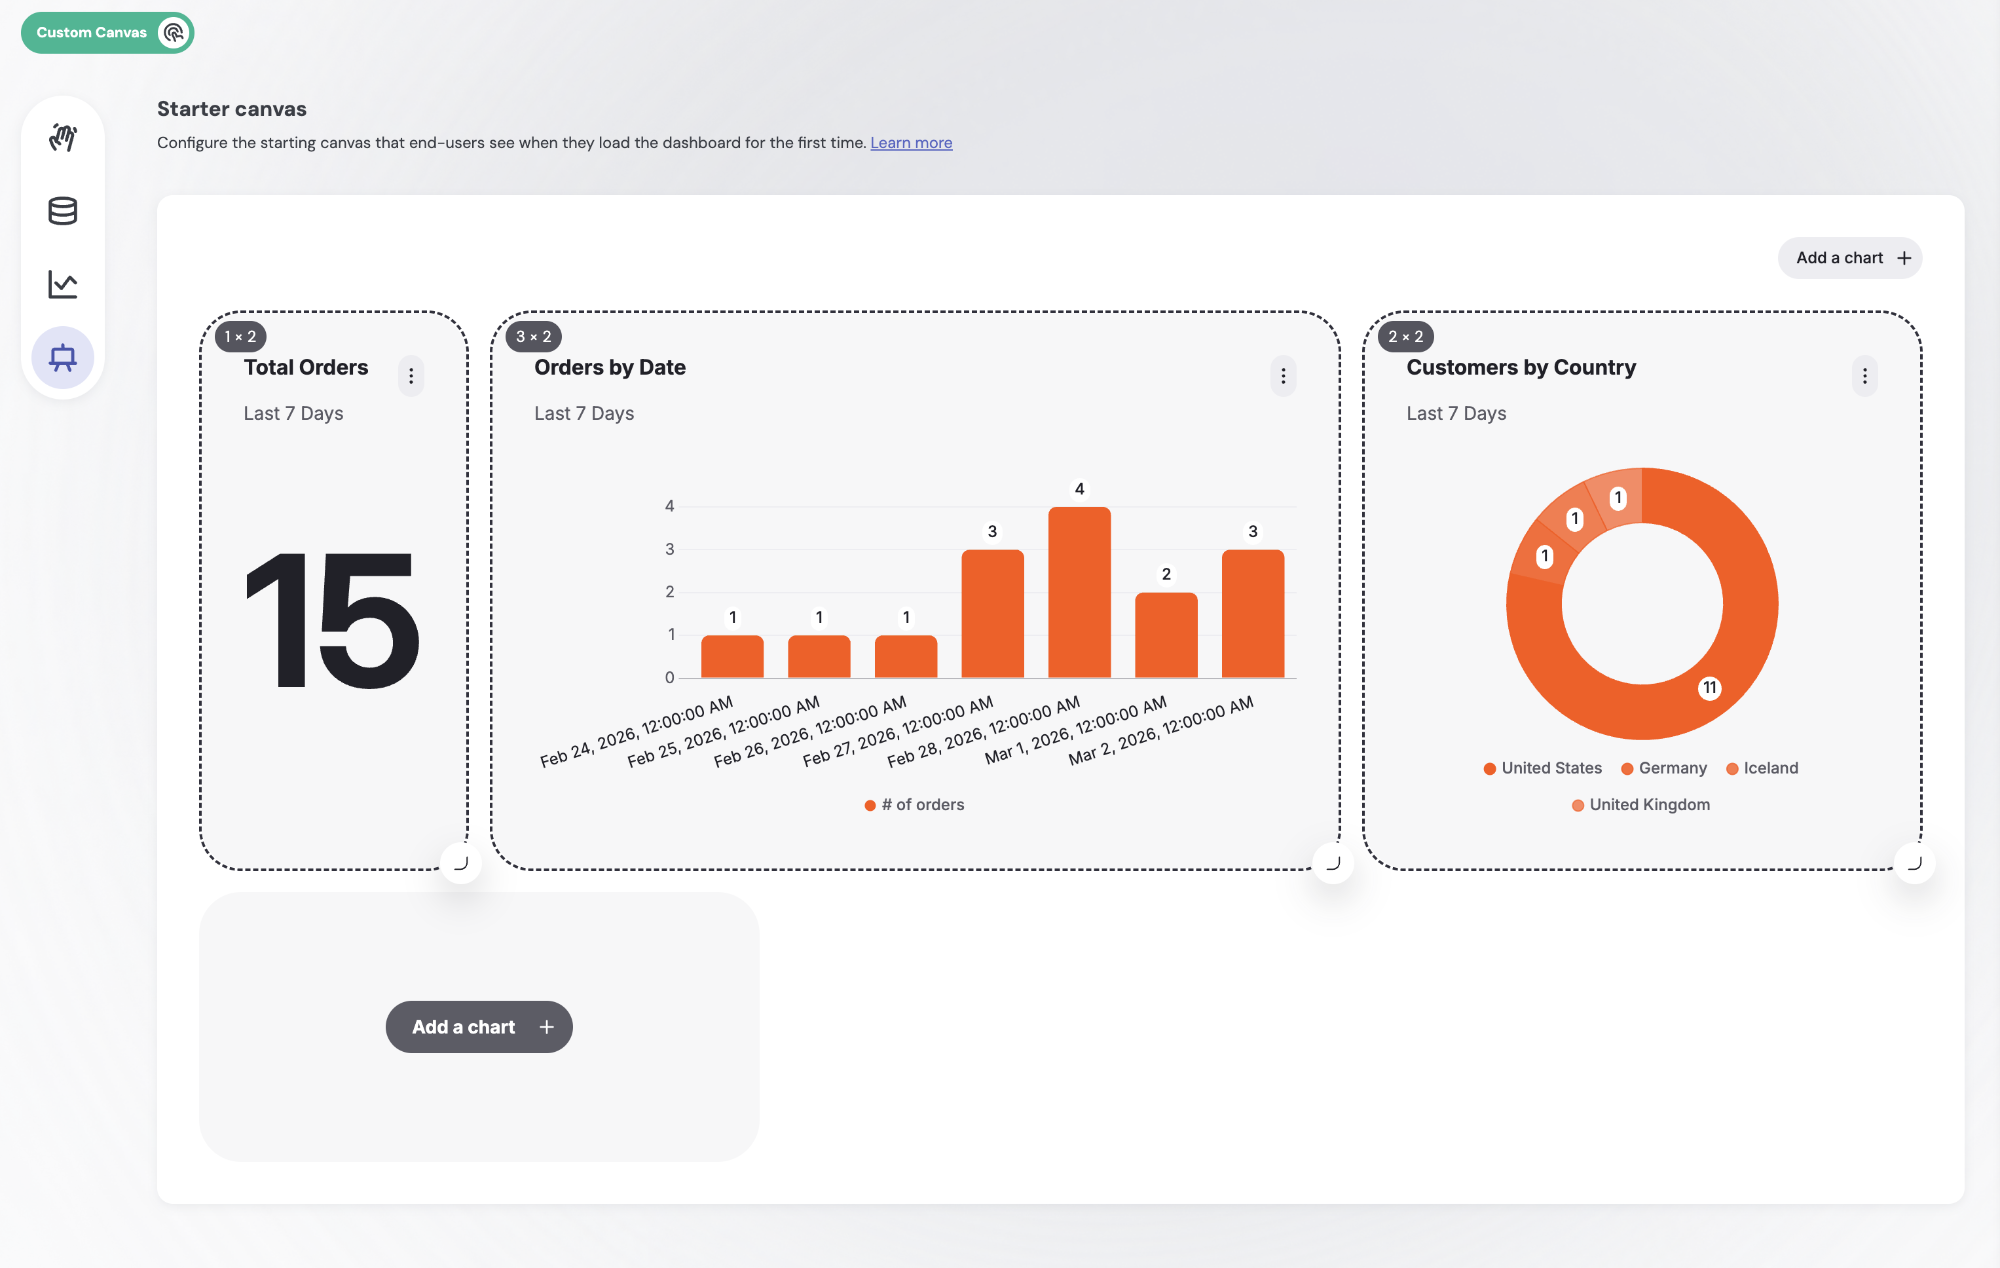
Inside, you'll find a canvas where you can build out the default layout:
- Drag, drop, and resize charts exactly as you would on the main canvas.
- Changes are automatically saved - the layout is preserved each time you return.
The Starter Canvas only applies to end-users who haven't yet made any changes to their own canvas. Once an end-user edits their dashboard, their version is preserved regardless of further updates you make to the Starter Canvas.
Preview and publish
When you’re ready, Preview the user experience to ensure everything looks and feels right. Then simply hit Publish to make Custom Canvas live for your users.
Building it in code
Everything above can also be defined in Dashboards as Code. A customCanvas block in your .embeddable.yml mirrors the builder one-to-one:
customCanvas:
  datasets: [...]       # the datasets you expose for exploration
  templates: [...]      # reusable chart templates, with inputs and an icon
  starterCanvas: {...}  # optional: the default layout new users start from
These map directly to the steps above — Select available datasets, Build a library of templates, and Set up a Starter Canvas. See the Custom Canvas section of the Dashboards as Code reference for the full schema, or build it with AI.
Styling Custom Canvas
Want to customize the look and feel of Custom Canvas to match your brand? See Custom Canvas UI for a guide to styling the colors, cards, buttons, and forms.
Deploying Custom Canvas
Now you’ve built a Custom Canvas and you’re ready to go live, learn how to deploy it.