Auto Height
Every widget on a dashboard is as tall as it was drawn in the builder, or as its YAML definition specifies. A component with more to show than fits in its tile — a table with more rows than the space it was given — scrolls inside it.
Auto height lets a widget grow to the height of its content instead, and pushes the widgets below it down the page. It matters most in a PDF export, where there is nobody to scroll: a table that shows eight rows on screen can print all of them.
Here is the same dashboard in both modes. In fixed height the table is the size it was drawn and scrolls inside its tile; in auto height the tile grows to fit it, and the chart underneath moves down the page. The "Showing 20 of 30 rows" line is that table's own doing — how many rows a component loads is a setting on the widget, not something the mode decides:
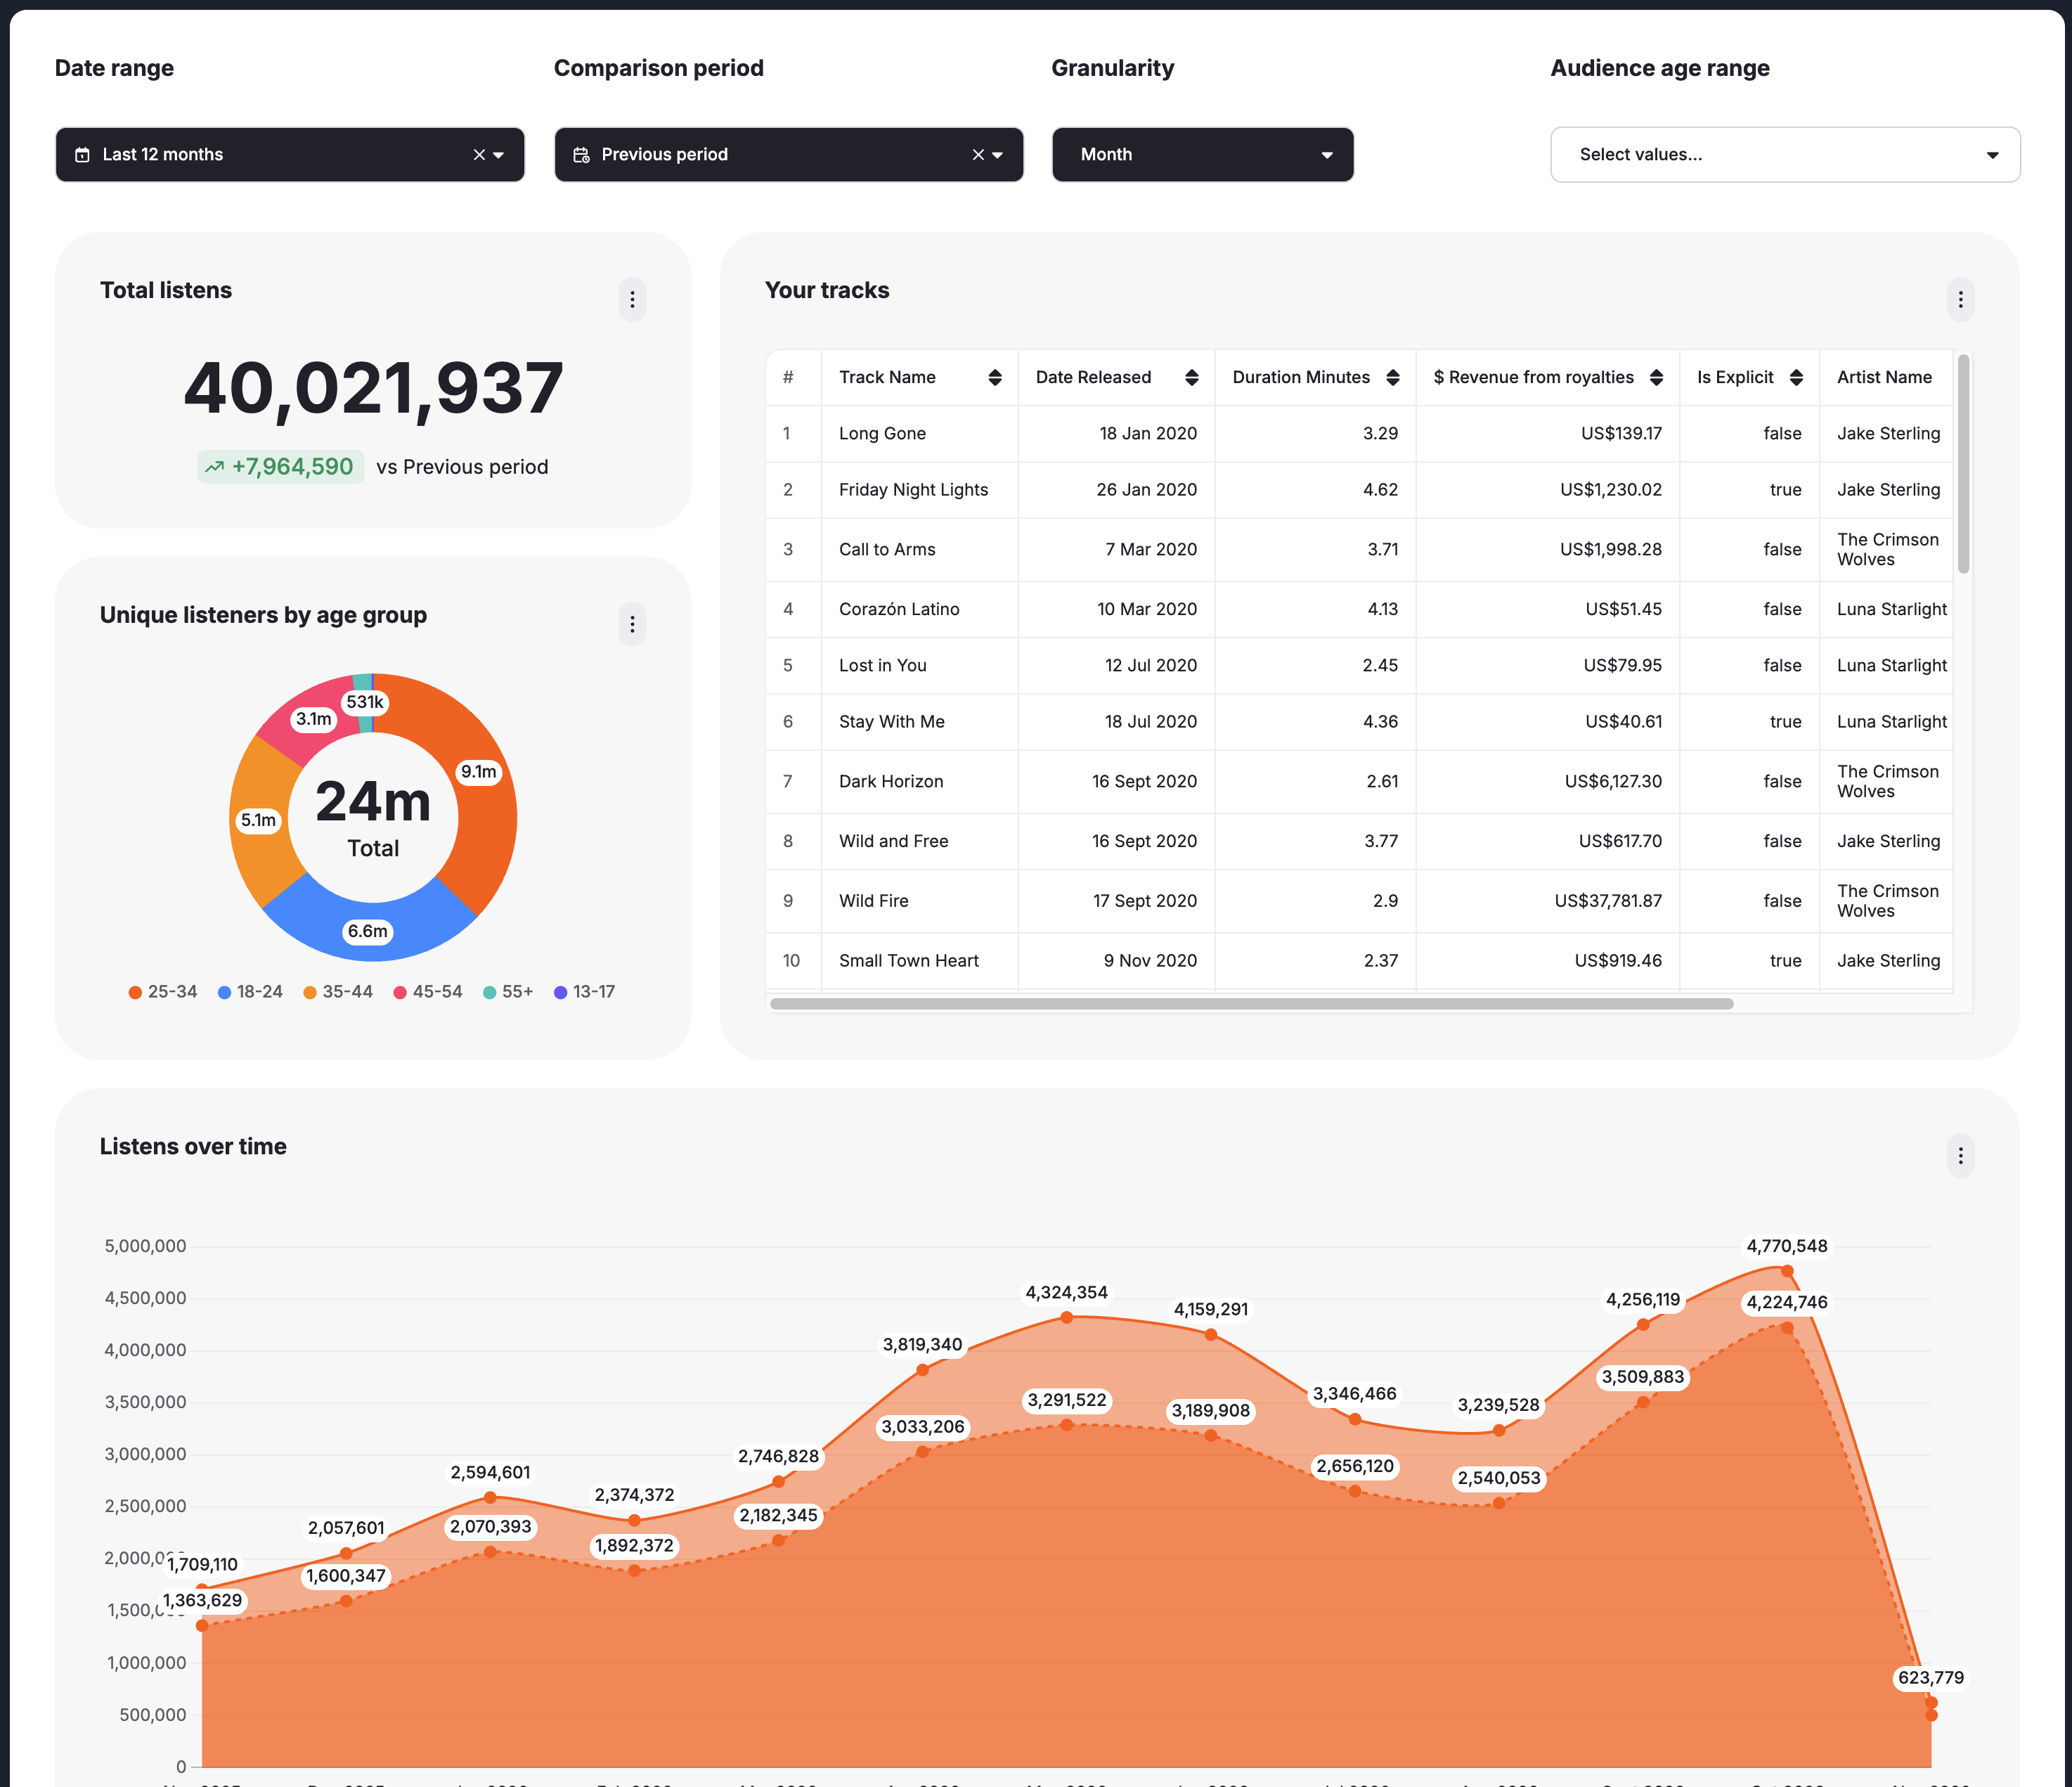
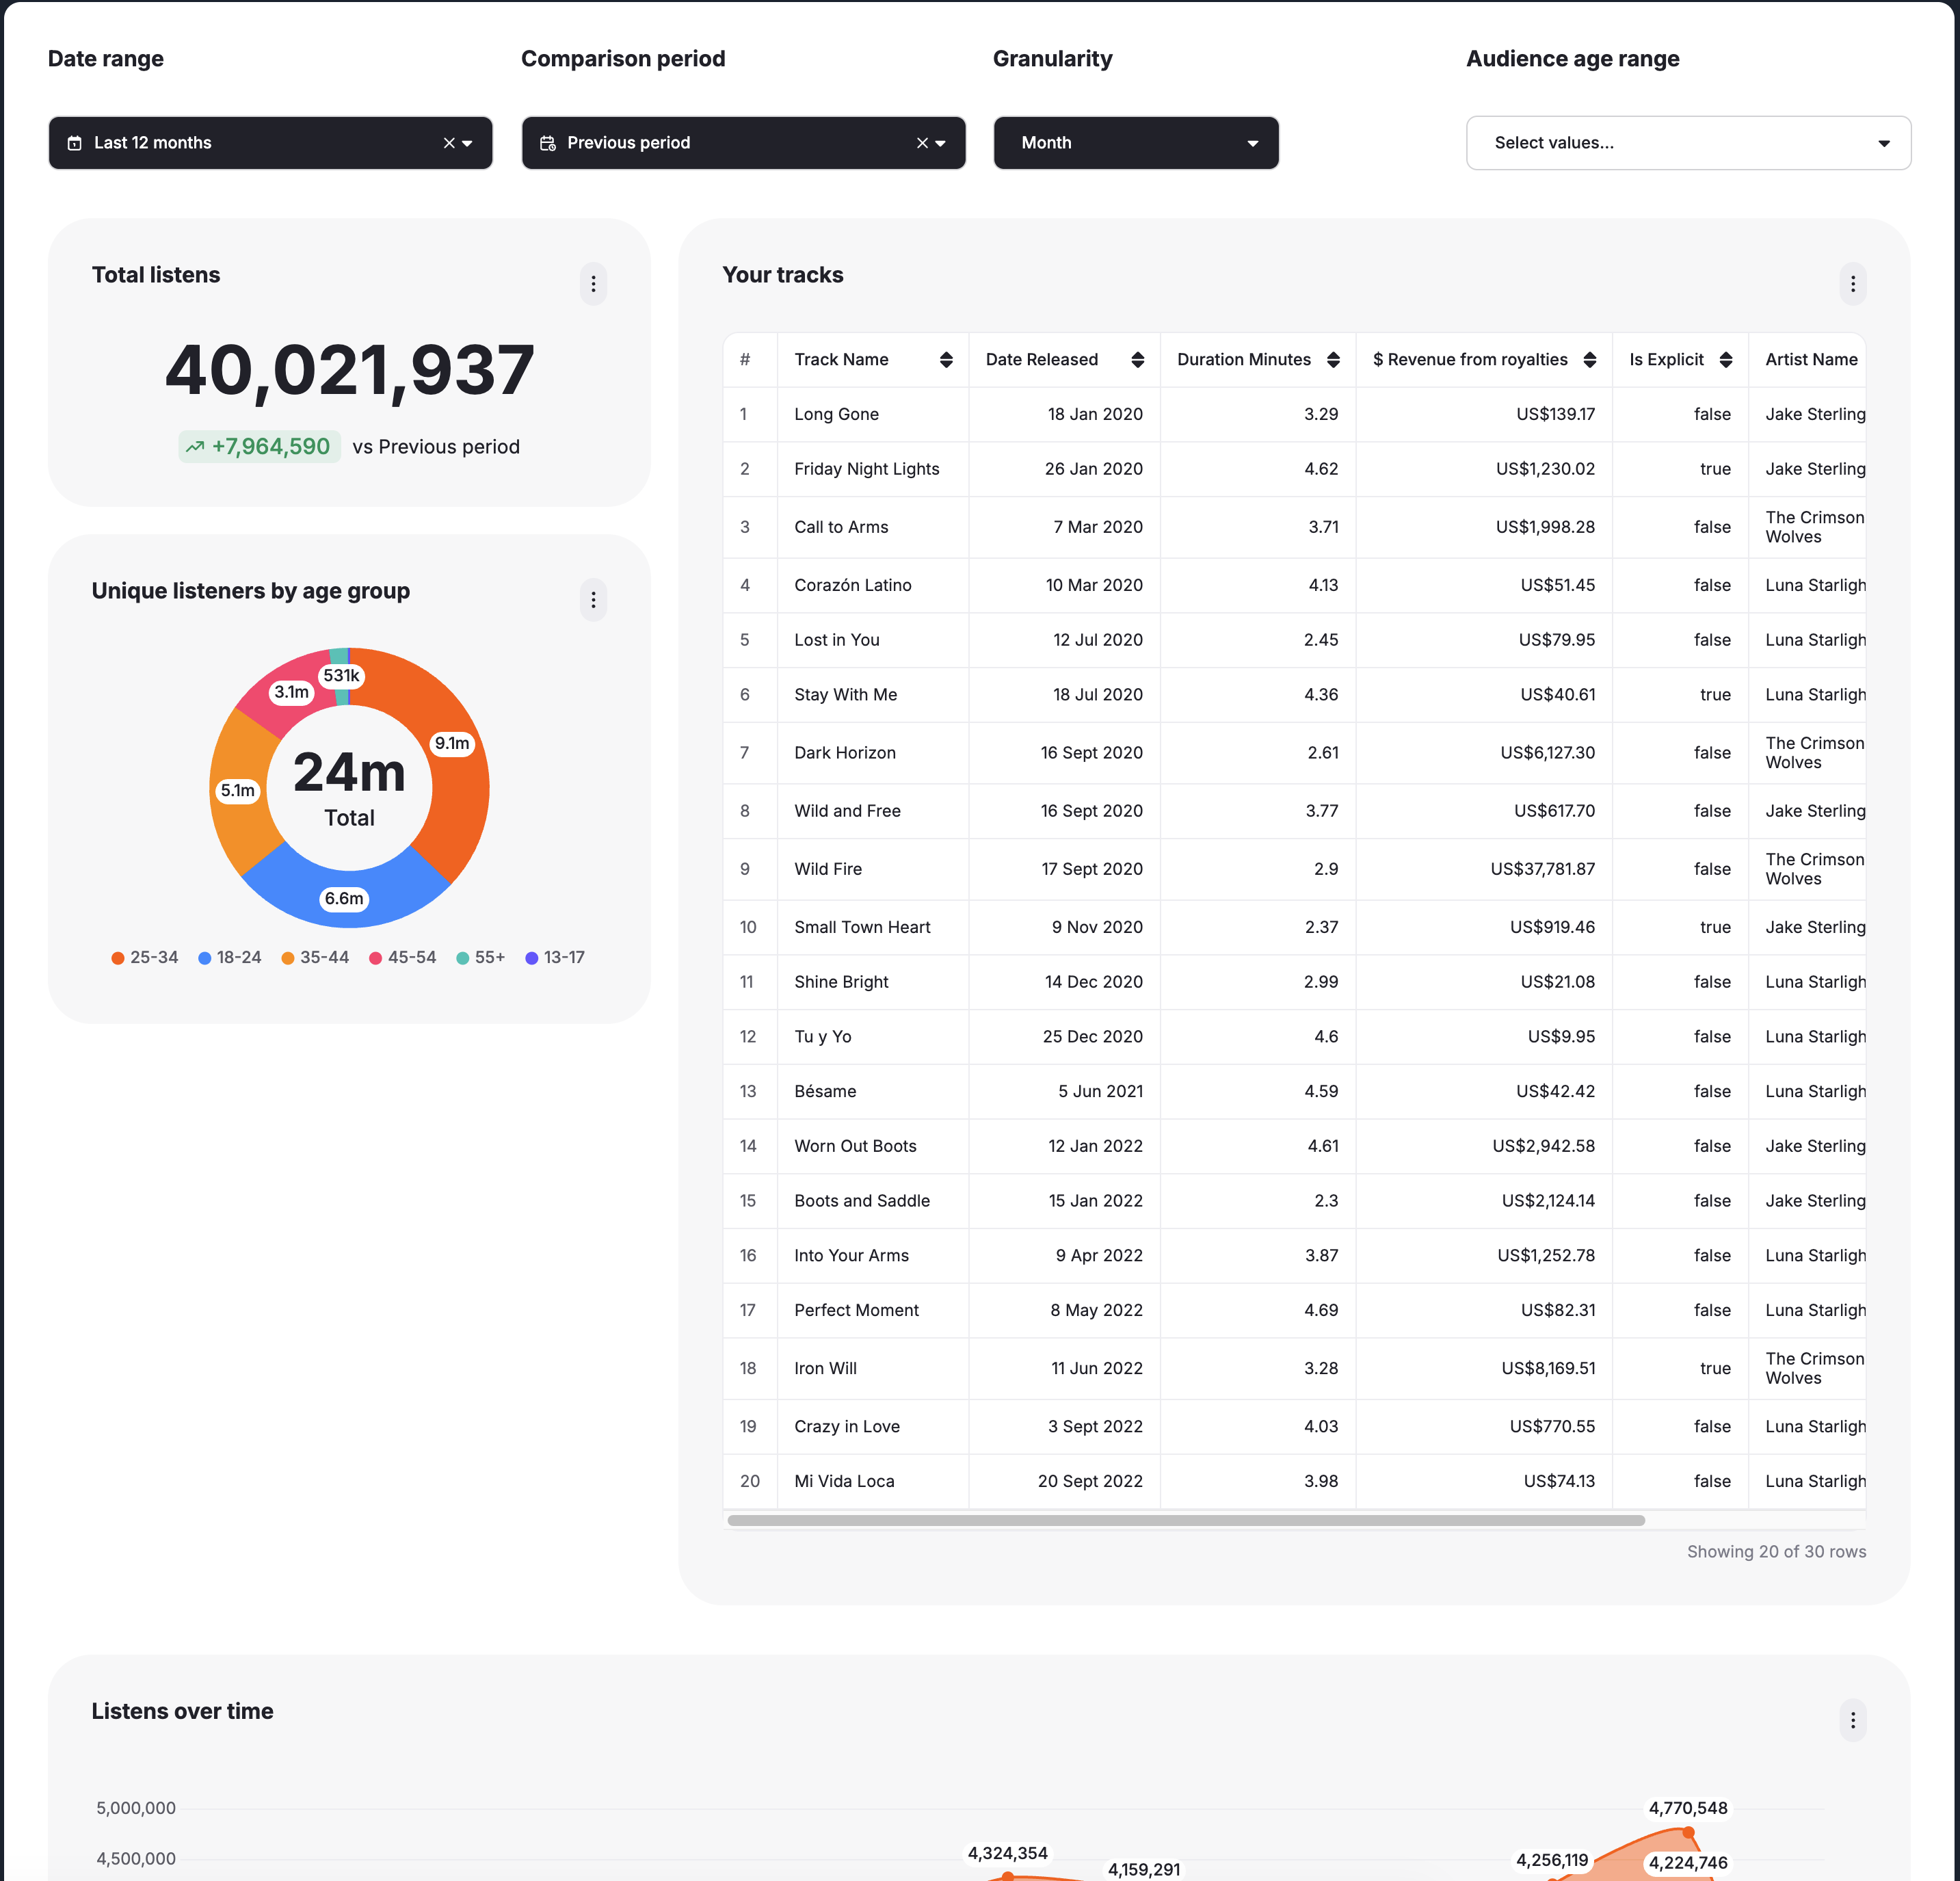
Two things have to agree before a widget grows:
- the host asks for it —
height-mode="auto"when embedding, orlayout.heightMode: "auto"when exporting. - the component declares it can do it —
meta.autoHeight: true.
A component that doesn't declare autoHeight keeps its designed height even on an auto-height dashboard, so turning the mode on never disturbs the widgets that aren't built for it.
Declaring that your component can grow
Add autoHeight to your component's meta:
export const meta = {
  name: 'MyPaginatedTable',
  label: 'My Paginated Table',
  autoHeight: true,
  inputs: [...],
} as const;
The flag is a promise about how your component renders, not a layout setting. Setting it tells the dashboard it is safe to give this widget whatever height it asks for, so in auto height your component needs to:
- render its whole content, with no scroll area of its own
- let its height be driven by that content, rather than stretching to fill the tile
A component that keeps a fixed-height scroll box will simply stay the size it already was.
Reading the mode
useEmbeddableLayout() tells your React component which mode it is rendering in:
import { HEIGHT_MODES, useEmbeddableLayout } from '@embeddable.com/react';

export default function MyPaginatedTable(props) {
  const { heightMode } = useEmbeddableLayout();
  const isAutoHeight = heightMode === HEIGHT_MODES.auto;
  // ...
}
Things to notice:
heightModeis either'fixed'or'auto', andHEIGHT_MODESgives you both values.- it's a React hook, so it's only available inside your component.
props()in your.emb.tsfile cannot call it — to branch your query on the mode, pass it back through Embeddable State, as the example below does. - the host can switch the mode on a dashboard that is already on screen, so read it as a value that changes rather than one fixed when your component mounts. Anything you accumulated under the old mode has to be replaced rather than extended.
Example: a table that pages on screen and prints in full
This is the pagination example with one branch added: in fixed height it loads a page at a time, and in auto height it loads everything the component is allowed to show in a single query.
// MyPaginatedTable.emb.ts

import { defineComponent } from '@embeddable.com/react';
import { loadData } from '@embeddable.com/core';
import TableComponent from './index';

export const meta = {
  name: 'MyPaginatedTable',
  label: 'My Paginated Table',
  autoHeight: true,
  inputs: [
    {
      name: 'ds',
      type: 'dataset',
      label: 'Dataset'
    },
    {
      name: 'columns',
      type: 'dimension',
      label: 'Columns',
      array: true,
      config: {
        dataset: 'ds'
      }
    },
    {
      name: 'autoHeightMaxResults',
      type: 'number',
      label: 'Max rows when expanded',
      defaultValue: 100
    },
  ]
} as const;

const PAGE_SIZE = 10;

export default defineComponent(TableComponent, meta, {
  props: (inputs, [state, setState]) => {
    const page = state?.page ?? 0;
    const isAutoHeight = state?.heightMode === 'auto';

    return {
      ...inputs,
      page,
      setPage: (newPage) => setState({ ...state, page: newPage }),
      setHeightMode: (heightMode) => setState({ ...state, heightMode }),
      results: loadData({
        from: inputs.ds,
        select: inputs.columns,
        ...(isAutoHeight
          ? { offset: 0, limit: inputs.autoHeightMaxResults, countRows: true }
          : { offset: page * PAGE_SIZE, limit: PAGE_SIZE })
      })
    };
  }
});
Inside your React component:
import { useEffect } from 'react';
import { HEIGHT_MODES, useEmbeddableLayout } from '@embeddable.com/react';

export default function TableComponent(props) {
  const { page, setPage, setHeightMode, results } = props;
  const { isLoading, error, data, total } = results;

  const { heightMode } = useEmbeddableLayout();
  const isAutoHeight = heightMode === HEIGHT_MODES.auto;

  // props() can't call hooks, so this is how the query gets to see the mode.
  useEffect(() => setHeightMode(heightMode), [heightMode]);

  if (isLoading) return <Loading />;
  if (error) return <Error msg={error} />;

  return (
    <div>
      <Table data={data} />

      {isAutoHeight ? (
        total > data.length && <p>Showing {data.length} of {total} rows</p>
      ) : (
        <>
          <button onClick={() => setPage(Math.max(0, page - 1))} disabled={page === 0}>Prev</button>
          <button onClick={() => setPage(page + 1)}>Next</button>
        </>
      )}
    </div>
  );
}
Things to notice:
- in auto height the query asks for the whole allowance once, instead of a page at a time. There is no scrolling and no paging, so every row has to arrive in the response the widget is measured on.
- the Prev/Next buttons are hidden in auto height. Nothing is left to page through, and in a PDF nobody can click them.
countRows: truemakes the response carrytotal, the number of rows matching the query. It costs an extra count on your database, so only ask for it in the mode that uses it.- the component says so when the allowance cut the query short, rather than presenting a shortened table as if it were complete. In a PDF this line is the reader's only clue that rows are missing.
How many rows to allow
Give the expanded mode an input of its own, as the example does, and keep its default modest. The query is the only limit on how tall the widget becomes, and a dashboard tall enough to hold tens of thousands of rows is slow to render, slow to export and awkward to read.
Exports have a hard ceiling on top of that: a rendered dashboard above roughly 6,000 table rows is refused rather than captured. See Exporting in auto height.